Technicolor No. III 1927-1932
THE PROCESS
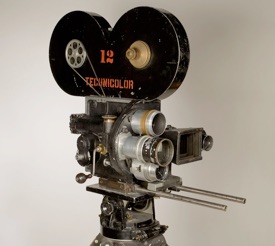 Dang, I miss having a turret lens mount.
To create a digital version of Technicolor III, there's a few things we need to know first.
Technicolor No. III (1927 to 1935) was a 2-colour imbibition (I.B.) dye transfer process, shot with the Technicolor System 2 camera that shot two frames for every image, on filtered red and one filtered green, and recorded simultaneously on a single negative film. The two frames were exposed through a prism that split the incoming light.
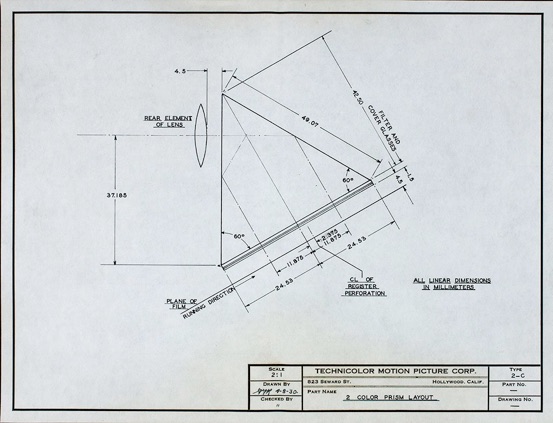 Technicolor System 2 camera 2 Color Prism Layout, from the Eastman Museum.
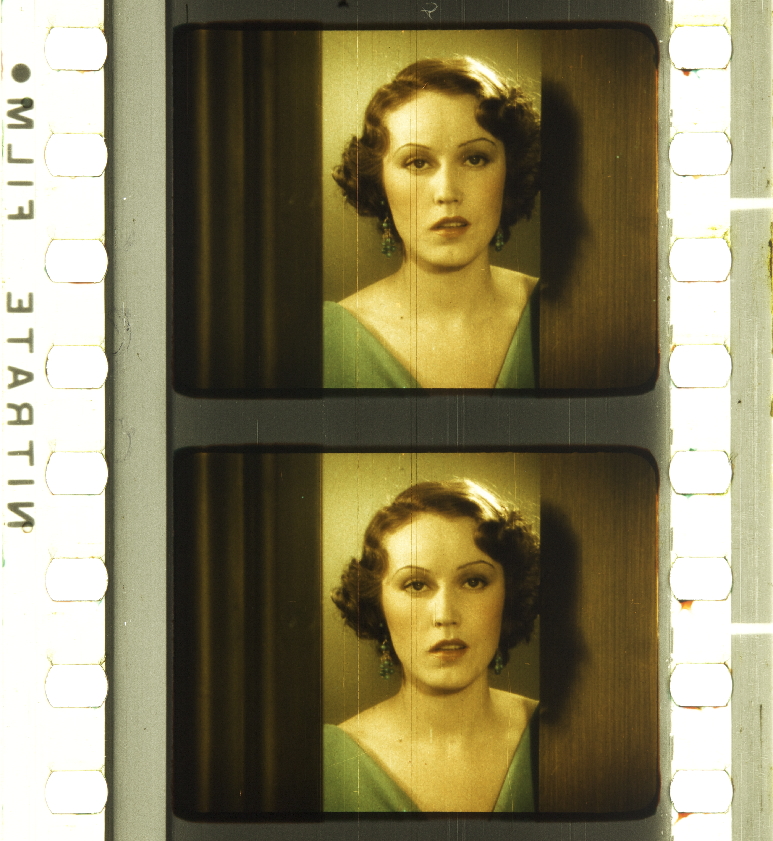
Each recorded frame was step printed onto a new separate positive strip, and then used to create a dye transfer print using the a corresponding color. Red filtered became green-ish, and green filtered became red-ish. The result was a colour process that couldn’t reproduce blues and had trouble with yellows but had decent blacks.
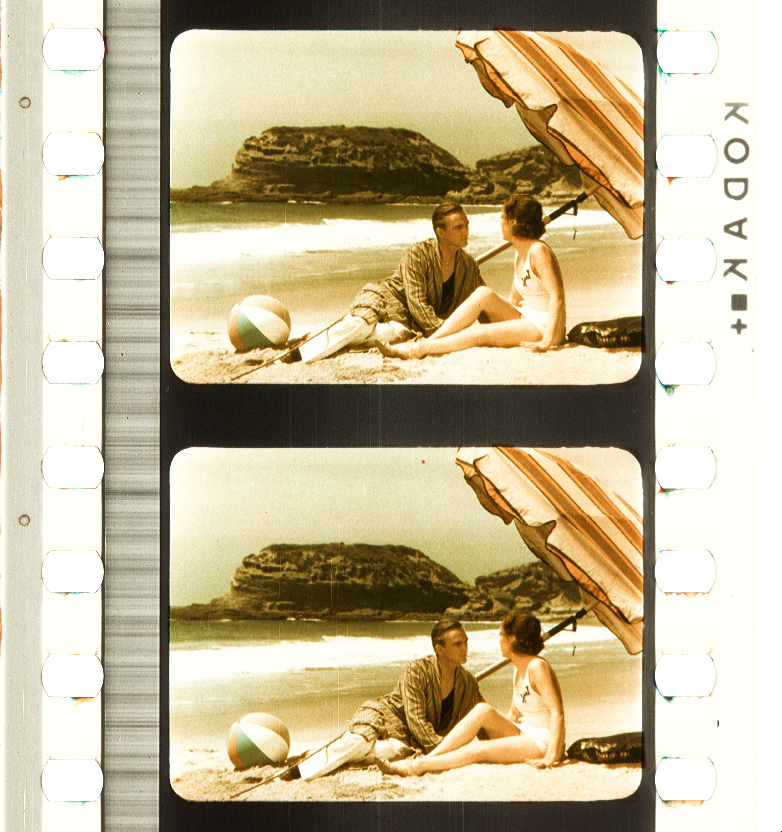
 Technicolor System 2 camera neg from Follow Thru (1929), with green filtered on top (with dot), red filtered on bottom. Credit: Geo. Willeman, Nitrate Film Vault Manager, Library of Congress, from the Timeline of Historical Film Colors.1
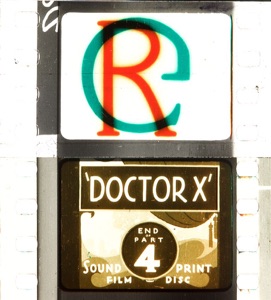
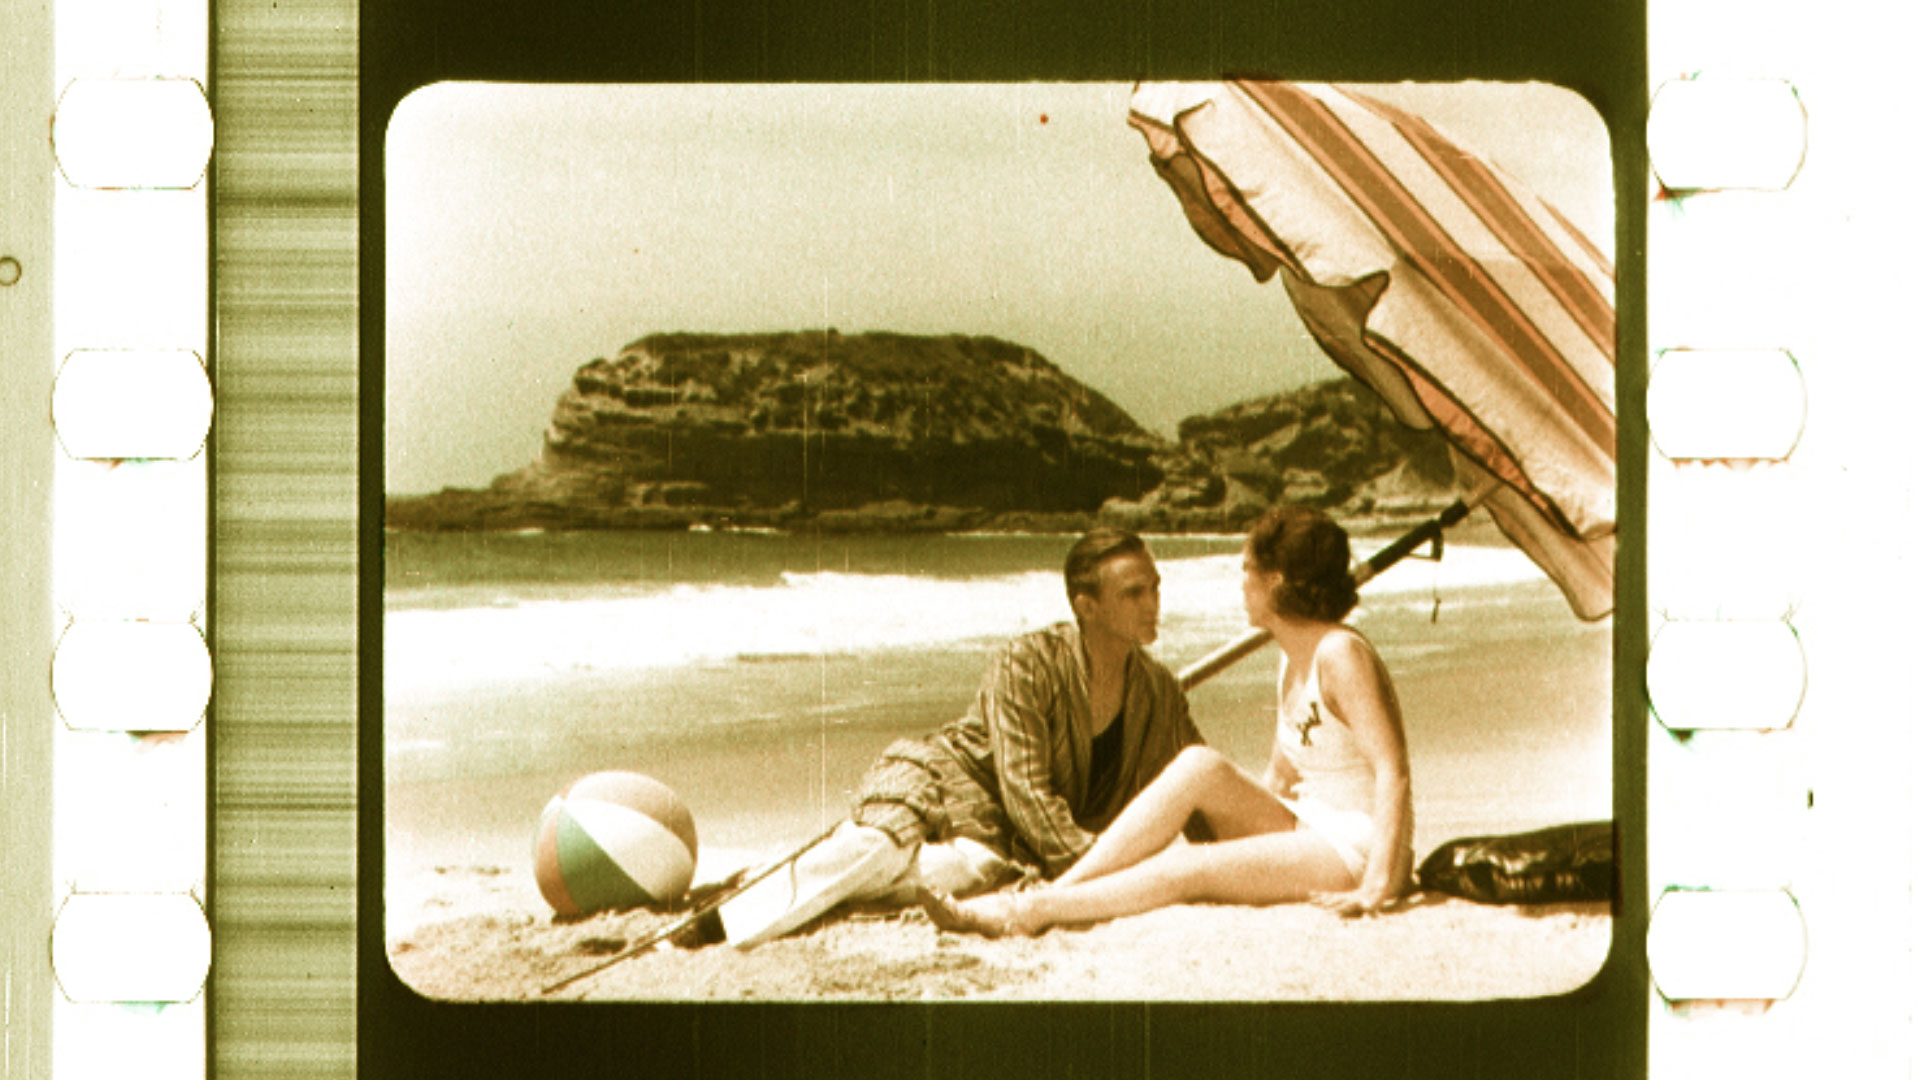
 Doctor X (USA 1932, Michael Curtiz). Credit: Library of Congress. Photograph of the nitrate print by Barbara Flueckiger, source Timeline of Historical Film Colors.
THE DIGITAL PLAYGROUND
I'm going to use After Effects as my engine for doing this, constrained by the How-to Rules outlined in the previous article to duplicate real-world dyeing, and optical effects.
To reproduce the Technicolor III process in a digital model, we need to replicate two parts: the camera and the dye printing process.
The Camera
There’s a few parts to the camera.
- The lens, which we can ignore, because you’re already shooting footage with a lens. This will be the Source image.
- The 2 color prism, which sent all wavelengths of light two ways, recording two images simultaneously onto to a single strip of panchromatic black and white negative film stock, one of the red filtered image (green record) and one of the green filtered image (red record).
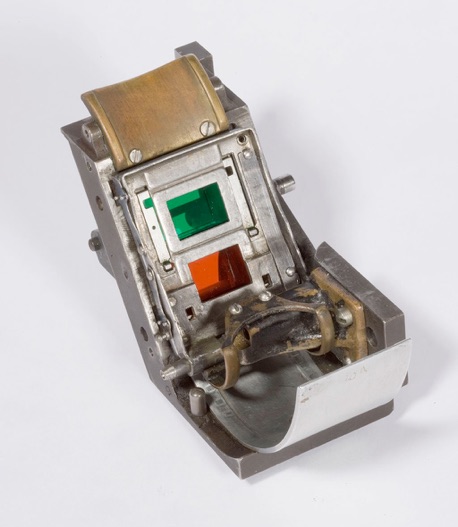 Technicolor System 2 camera filters, from the Eastman Museum.
 - Monochrome film stock. Other than being monochrome we can ignore all the effects of film stock. We're not adding curves or film conversions in our model, just the colour effects.
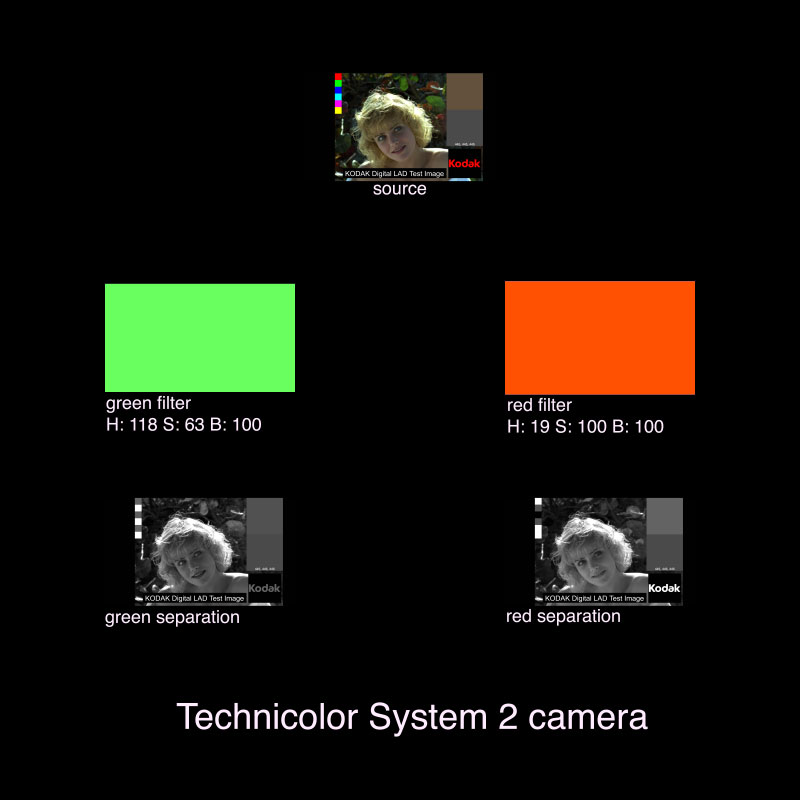
To create a digital camera, in After Effects,
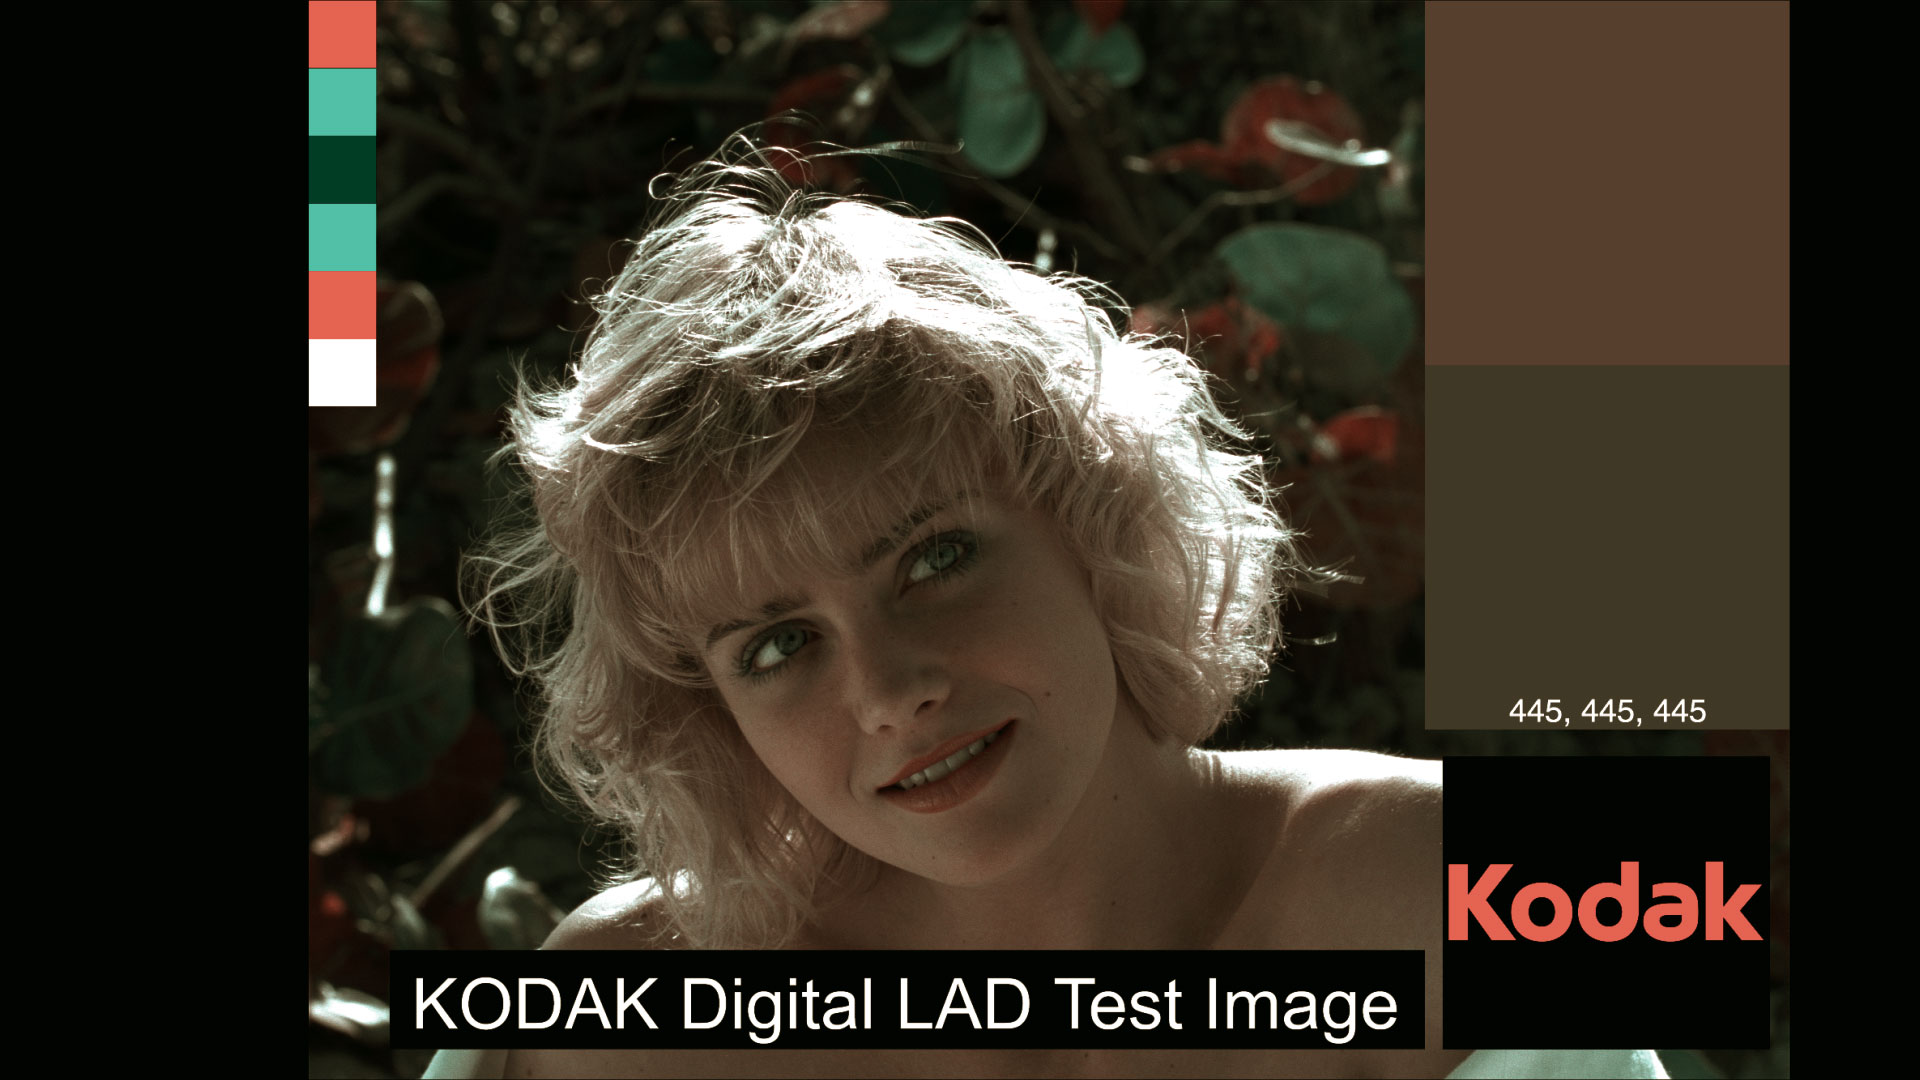
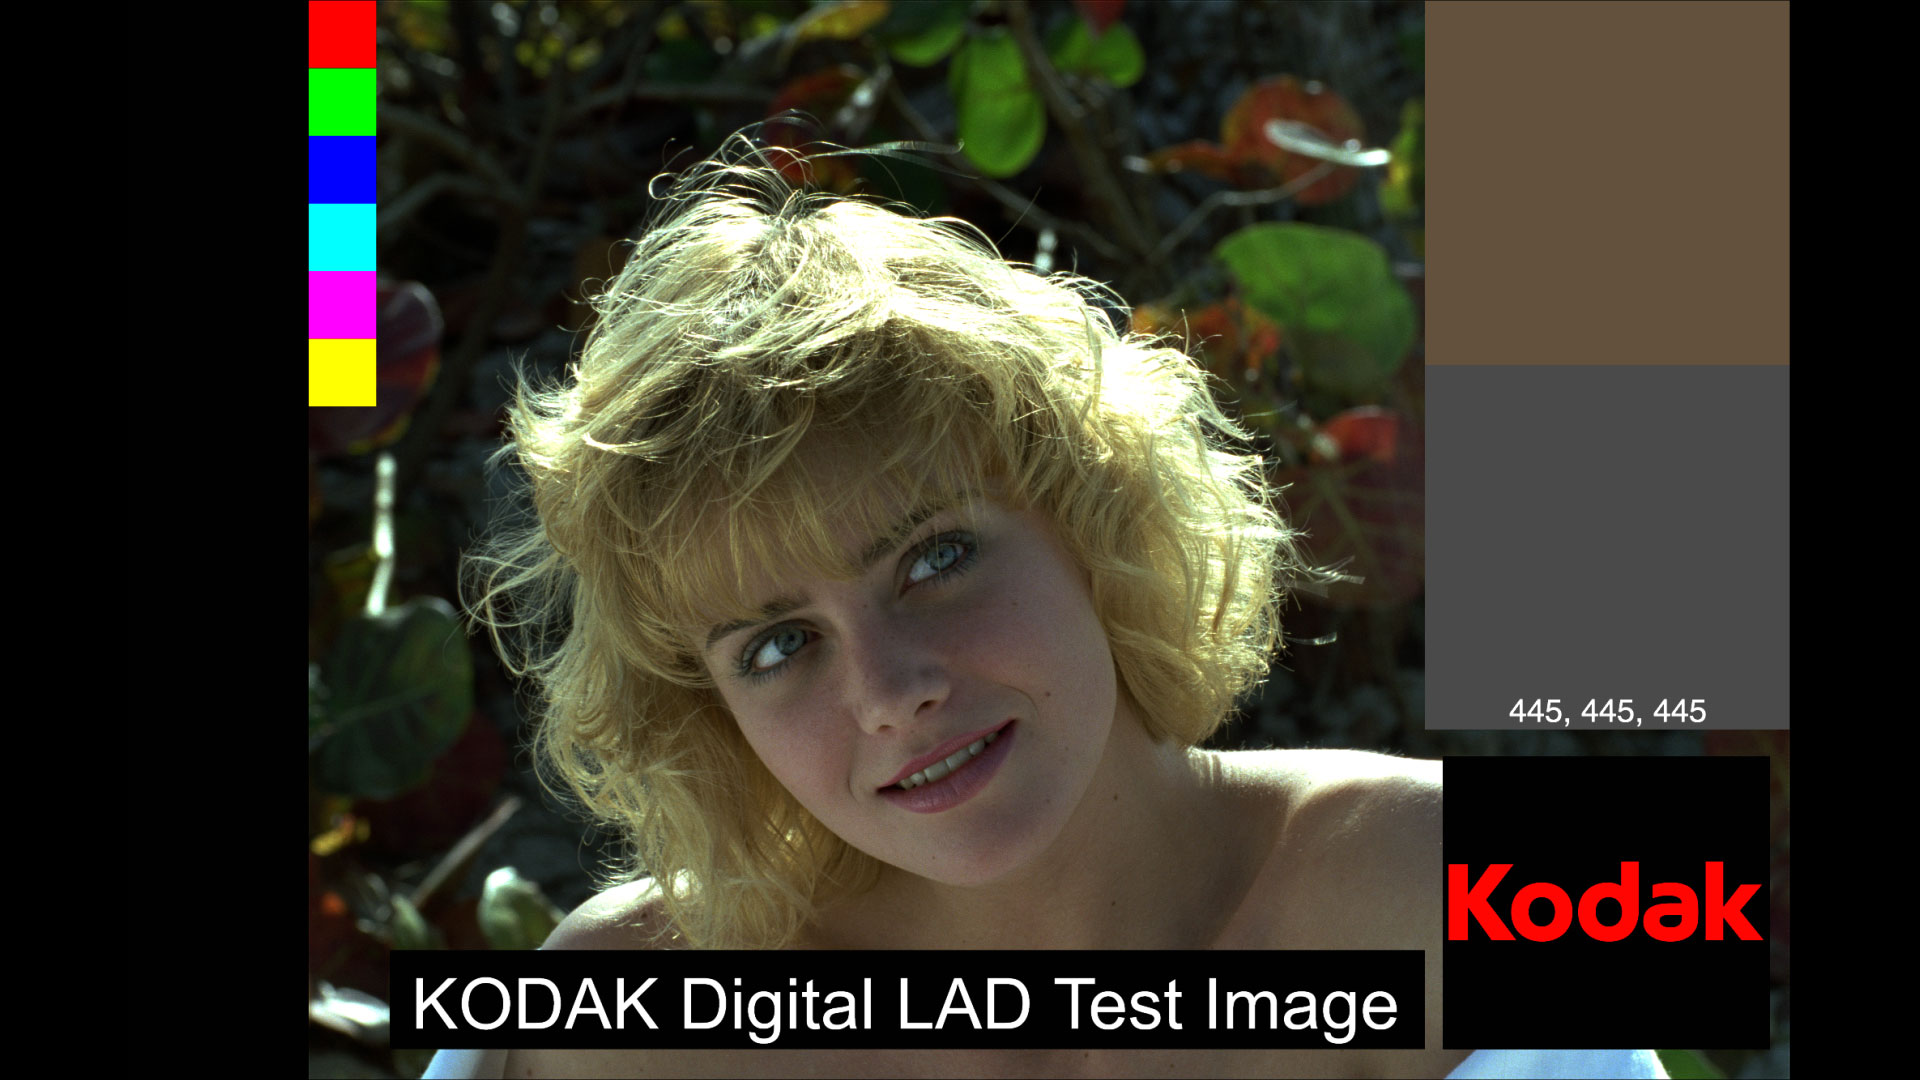
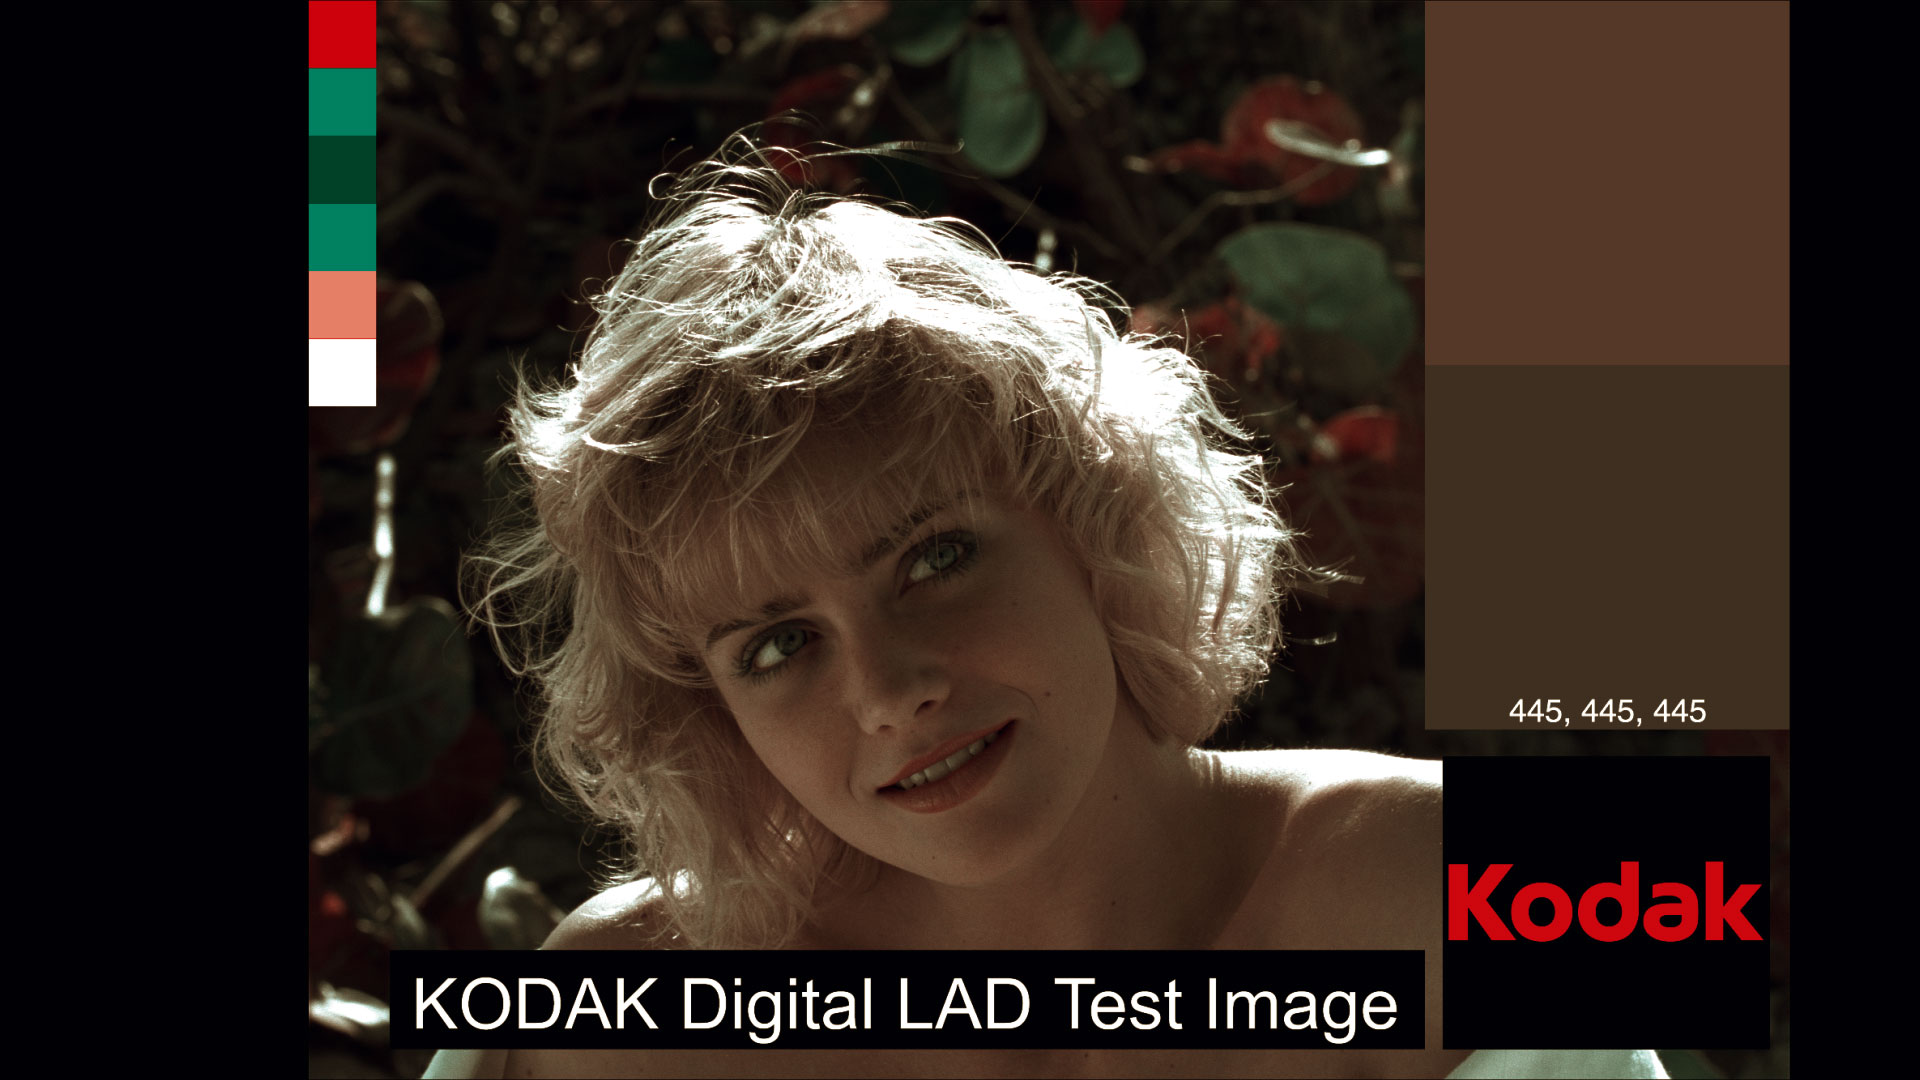
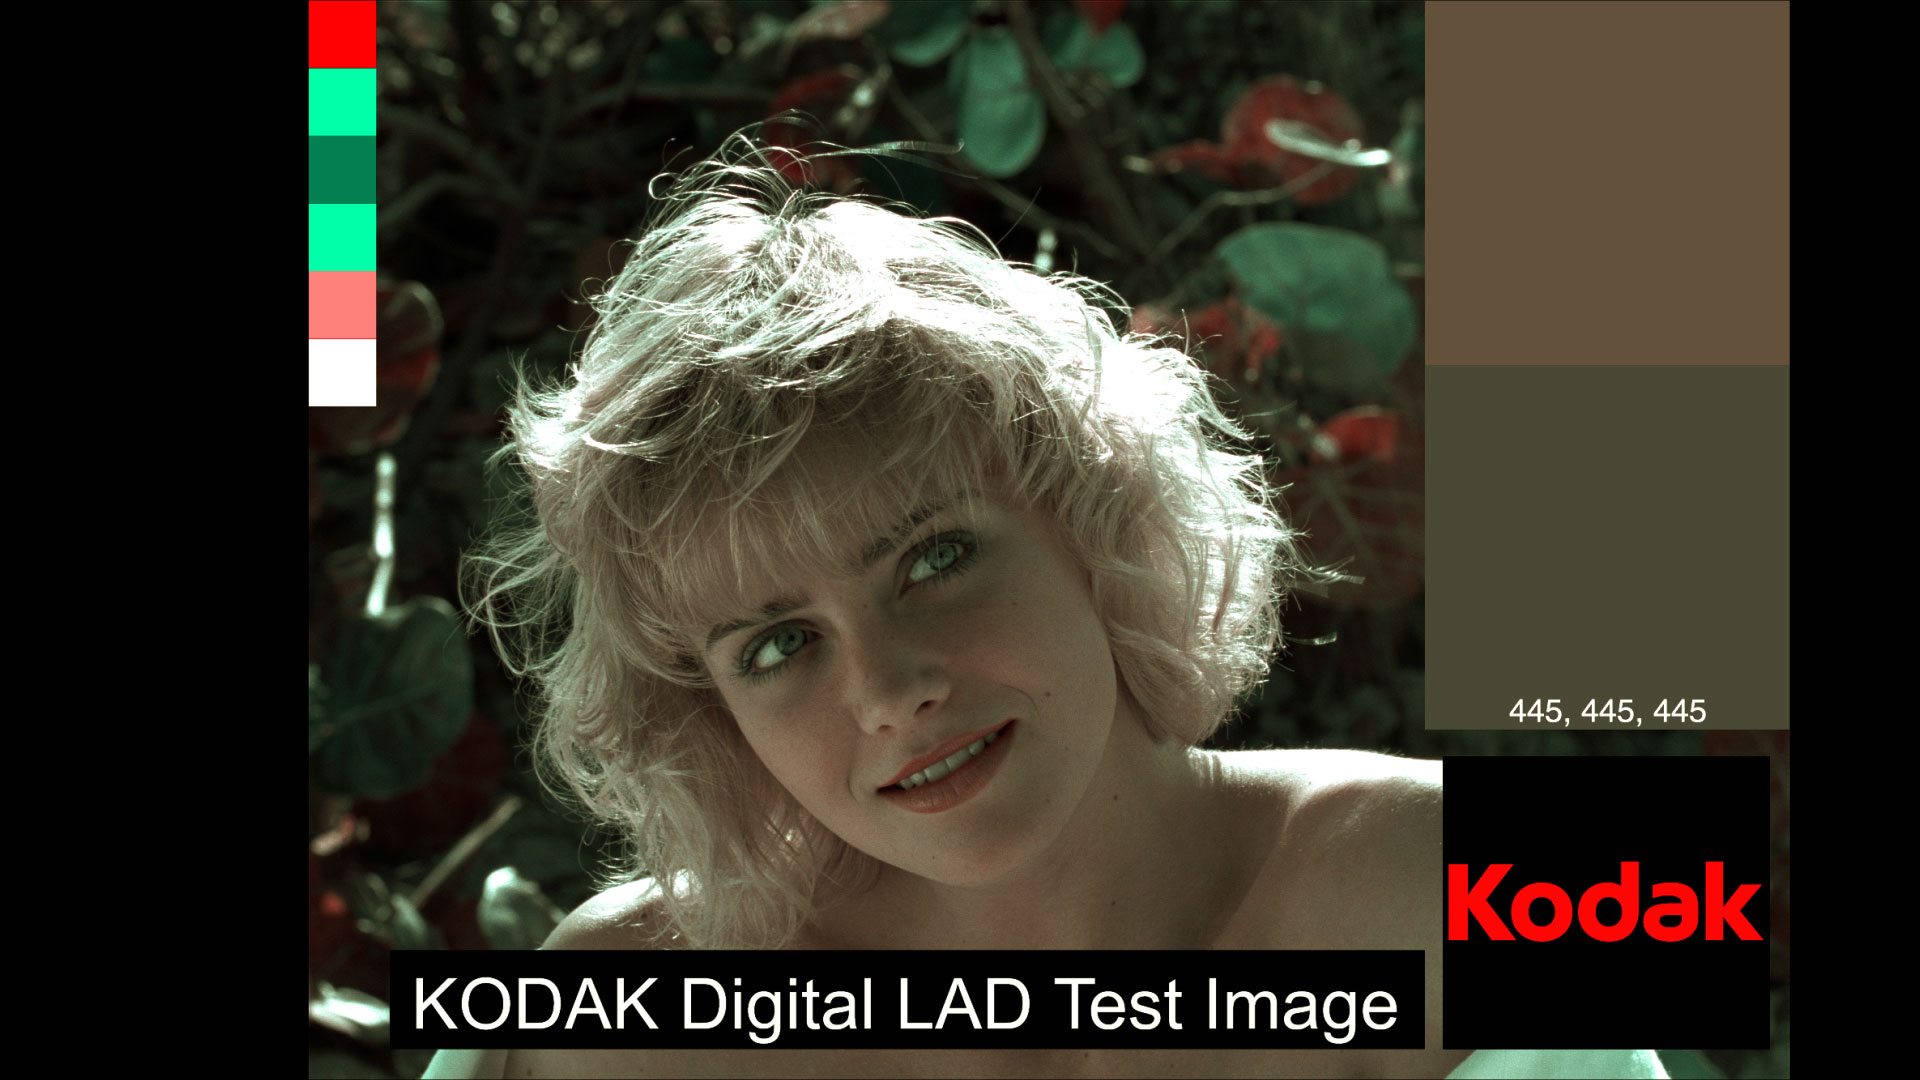
- put your source image into a new comp, call it source. I'm using the Kodak Digital LAD image, a.k.a, Marcie.
- put the source comp into two new comps, call them green separation and red separation.
- in green separation, add a new color solid, sized to comp size, and set it's color to Hue 118, Saturation 63%, Brightness 100%. For filters, we need 100% brightness, otherwise we reduce the white levels though the model. The 63% saturation allows some blue to pass through and get converted to green; otherwise blue would just be black. Send the blending mode of the solid to multiply.
- in red separation, do the same thing, but with a red colour solid set to Hue 19, Saturation 100%, Brightness 100%. and multiplied in.
- in each separation, make them monochrome with the CC Toner effect, set to 100 on all colour channels, because we're not creating a black and white look, we want a monochrome of the full dynamic range.
Here's an outline of the digital camera model:
THE PRINT
What we’ve just done is create a saturation map for our digital dyes. In the original dye imbibition process for Technicolor III, two matrixes were created from positive prints from the camera negative. The emulsion was hardened and the silver (darks) were chemically washed away. Then the colour dyes were added, bonding themselves to where the silver (darks) were. Think of it like filling a valley left in the emulsion. The deeper the valley (darker) the more dye was filled in (more saturation). This created print matrixes.
The matrixes were then aligned with their sprocket holes and sent through a mechanical press to transfer the dye from the color matrixes to a receiver print. The receiver print a specially prepared blank film, made from exposing the green record to create a positive. This was then put through a similar process, where the darks were washed away and replaced by yellow tanning.
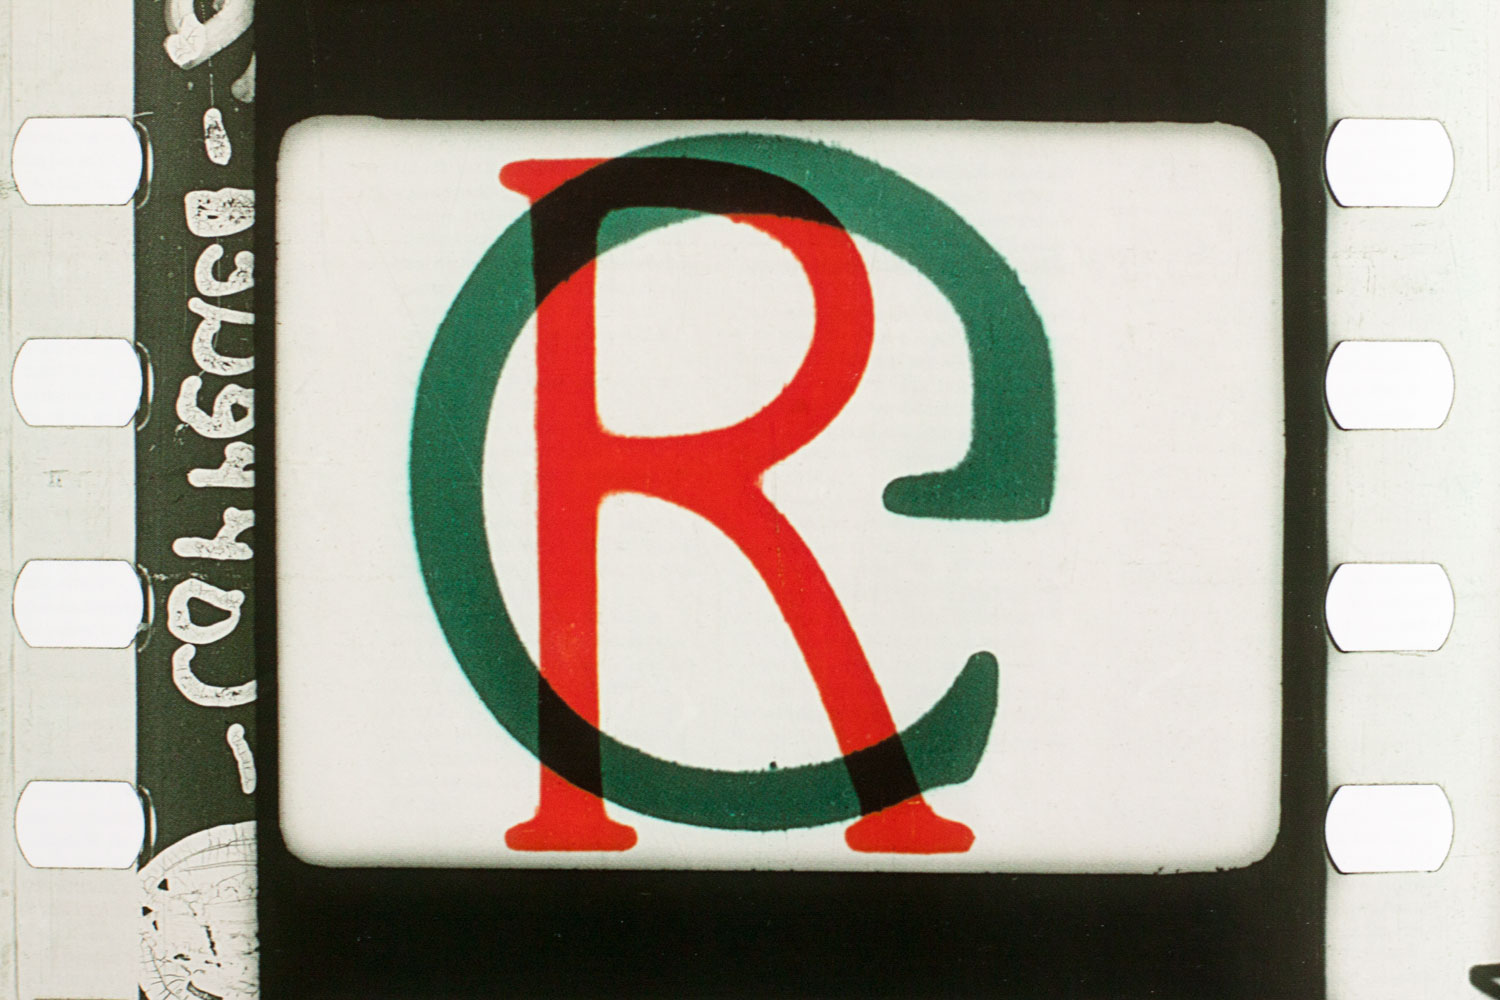
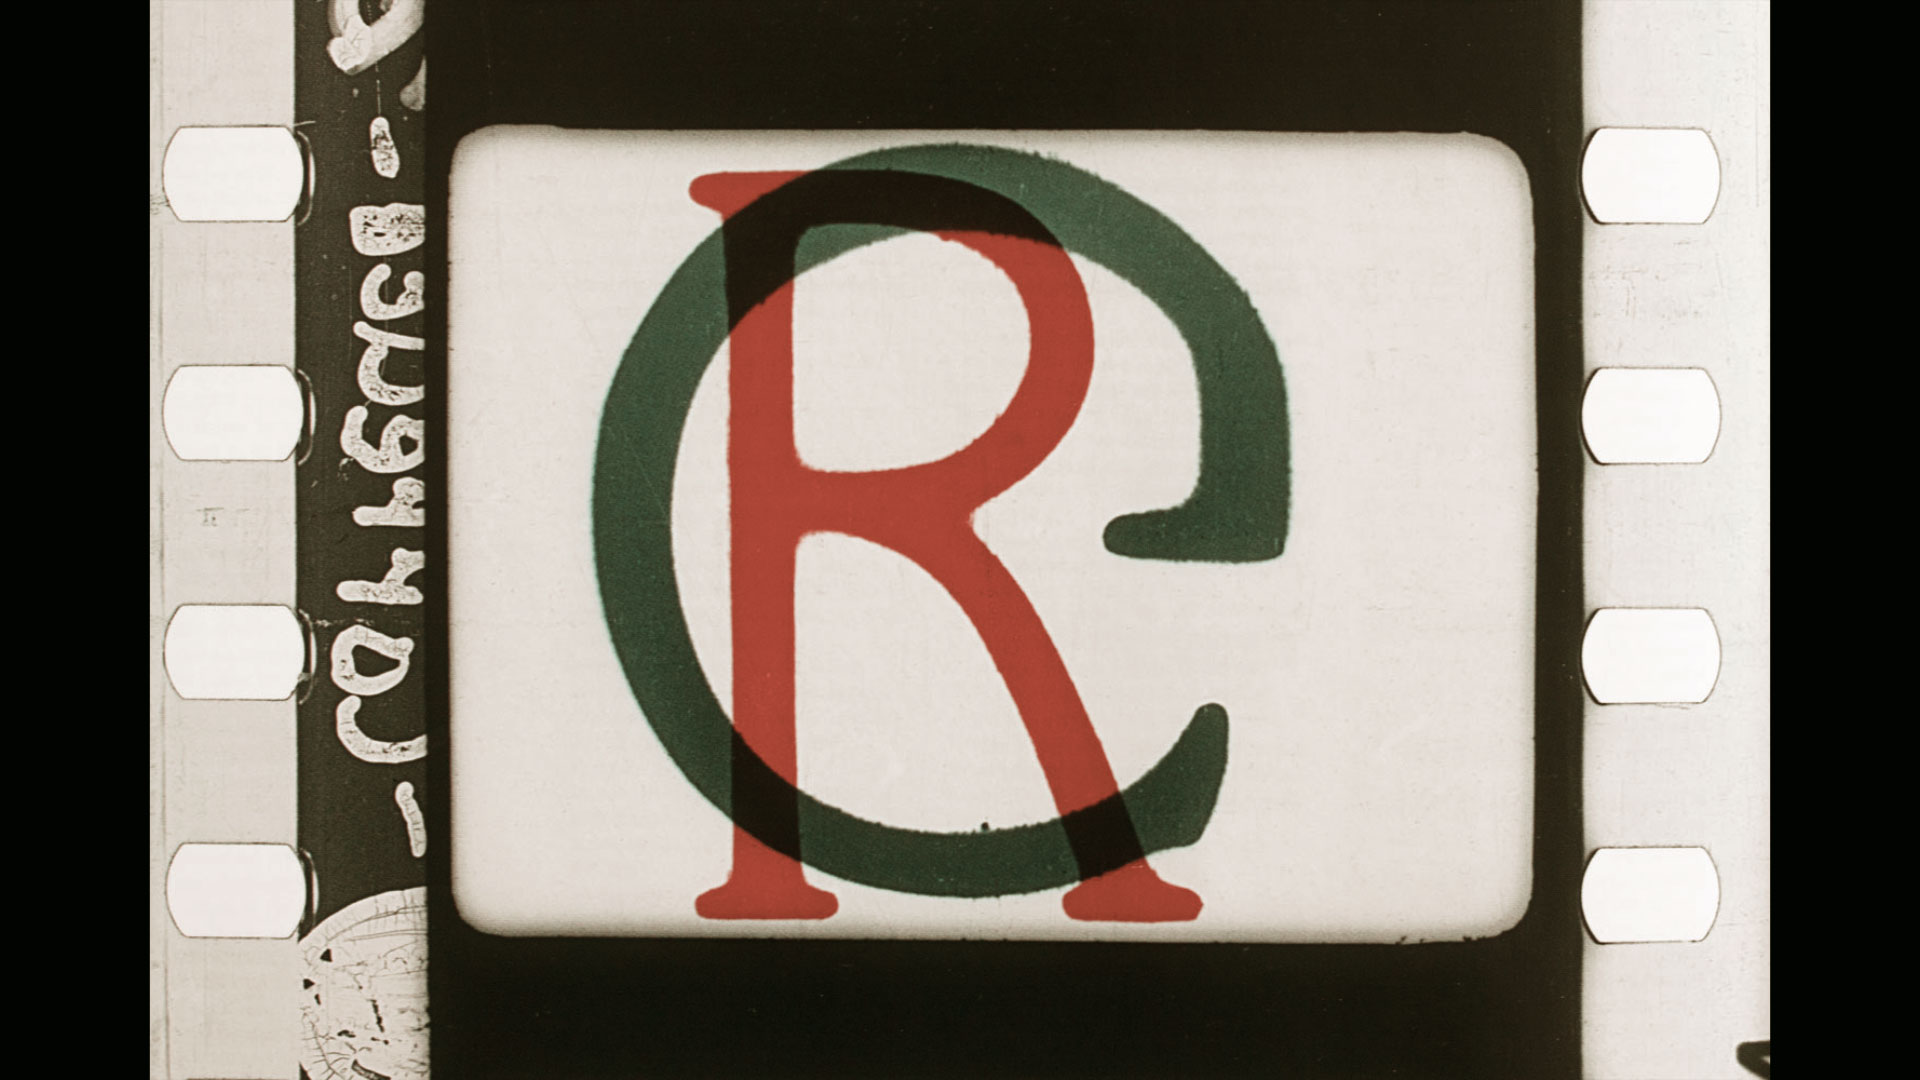
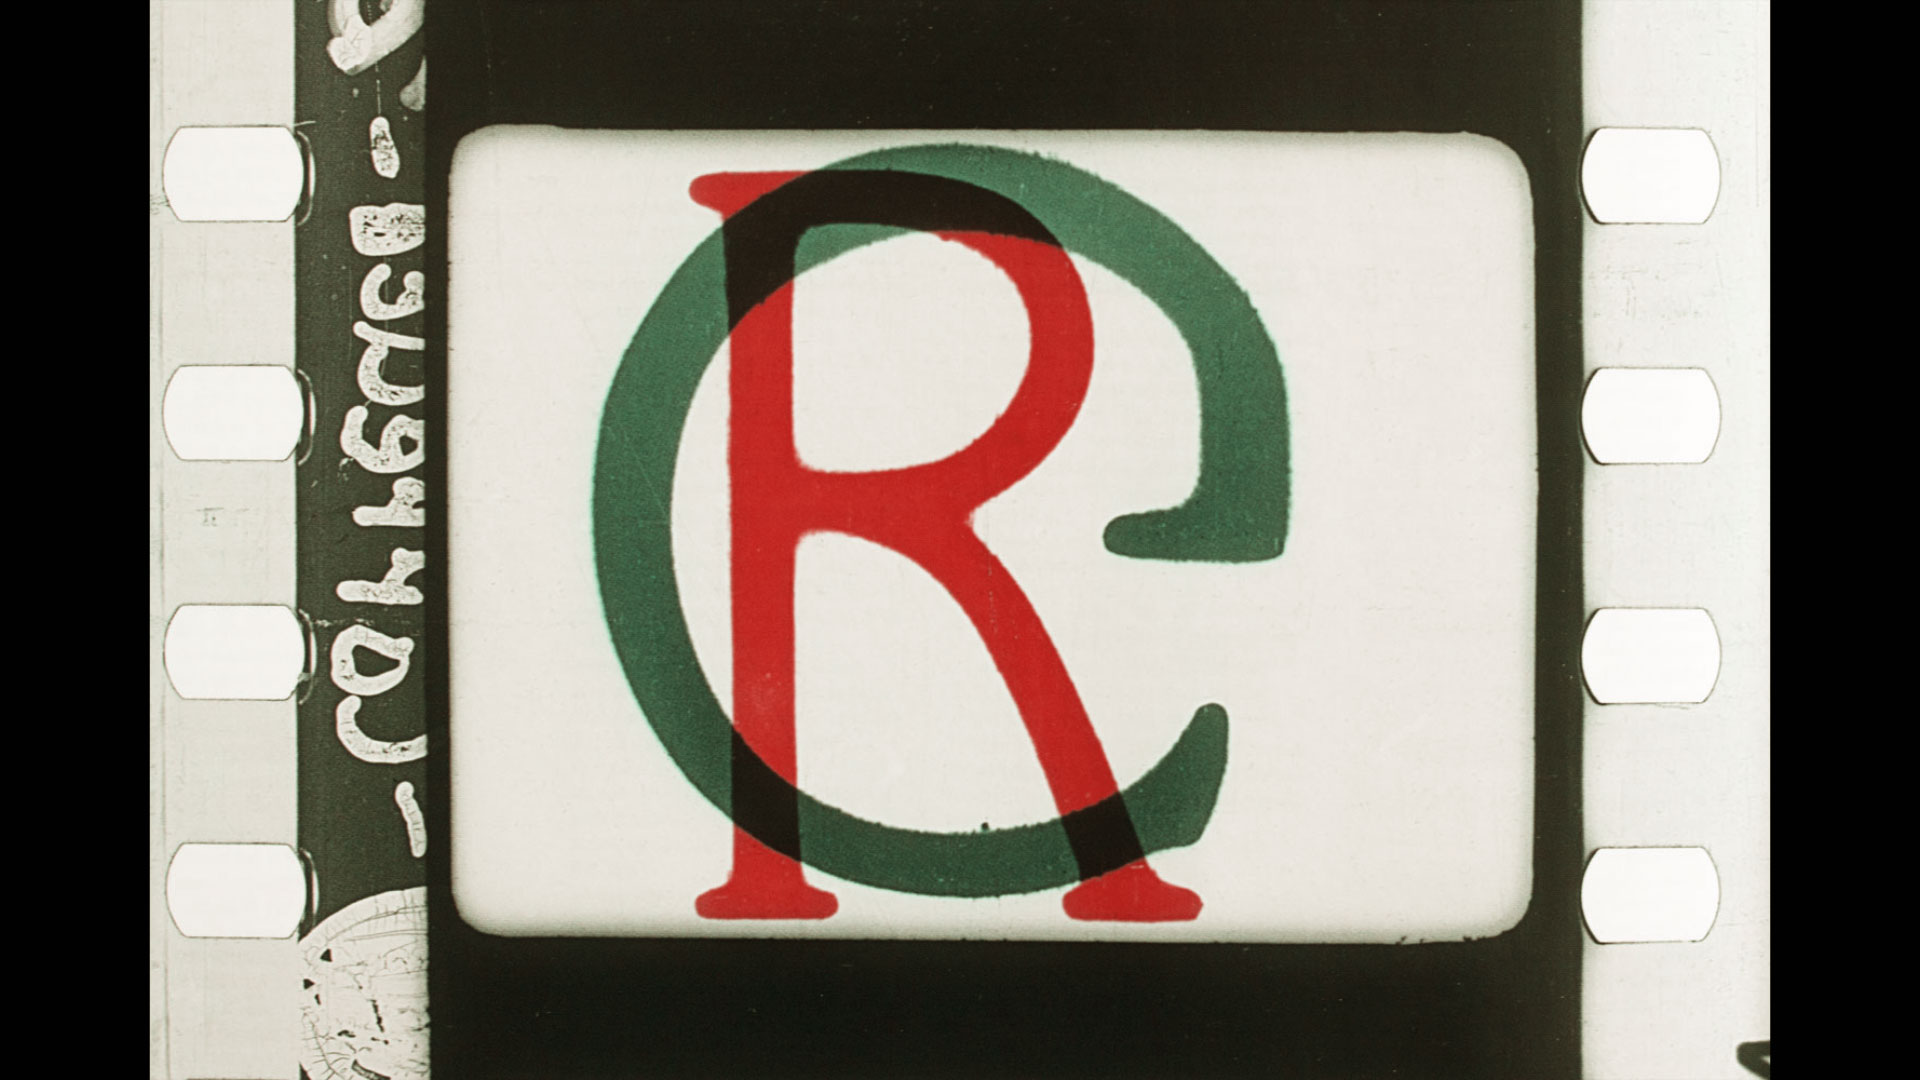
Still not convinced there was a receiver in Technicolor III? Take a look at this image from filmcolors.org of the RG test from a film tail:
Notice anything particular about the R? There is yellow fringing around the R! None around the G, just around the R. That yellow fringing only happens with a receiver, and it is evident with a lot of Technicolor III prints.
This yellow was the secret sauce of Technicolor III, adding in the colours needed for good flesh tones. How much yellow tanning was used depended on the year, the lab and the production. Sometimes more was added for effect. In fact, all the density of the dyes were adjustable, and used to create different effects and saturations of colour, which makes defining a single process as the definitive Technicolor III process difficult.
So for this digital process, let’s build a model of the printing process. In After Effects,
- we’ll make the matrix prints by making new comps for each dye layer from the corresponding separations. This is a subtractive colour process so each will be dyed the opposing colour. The red separation will go into the green print matrix and the green separation will go into the red print matrix.
add the dye with the CC Toner effect set to Duotone, with pure white Highlights and samples of the colour dyes for the shadows, taken from this image:
 Scan from The Dawn of Technicolor: 1915–1932, James Layton , David Pierce, George Eastman House, 2015. A sample technicolor III I.B. print showing the pure dyes.
Sampled, I get Red H: 2 S: 100 B: 83 and Green H: 166 S: 93 B: 64. For matrix dyes, we need full saturation for them to work (and give a full black), so bump Green up to H: 166 S: 100 B: 64. Because we're doing subtractive colour, we're building blacks with our colours and not highlights.
build the receiver by making a new comp with the green separation, and adding yellow toning with CC Toner on the shadows with samples from this image:
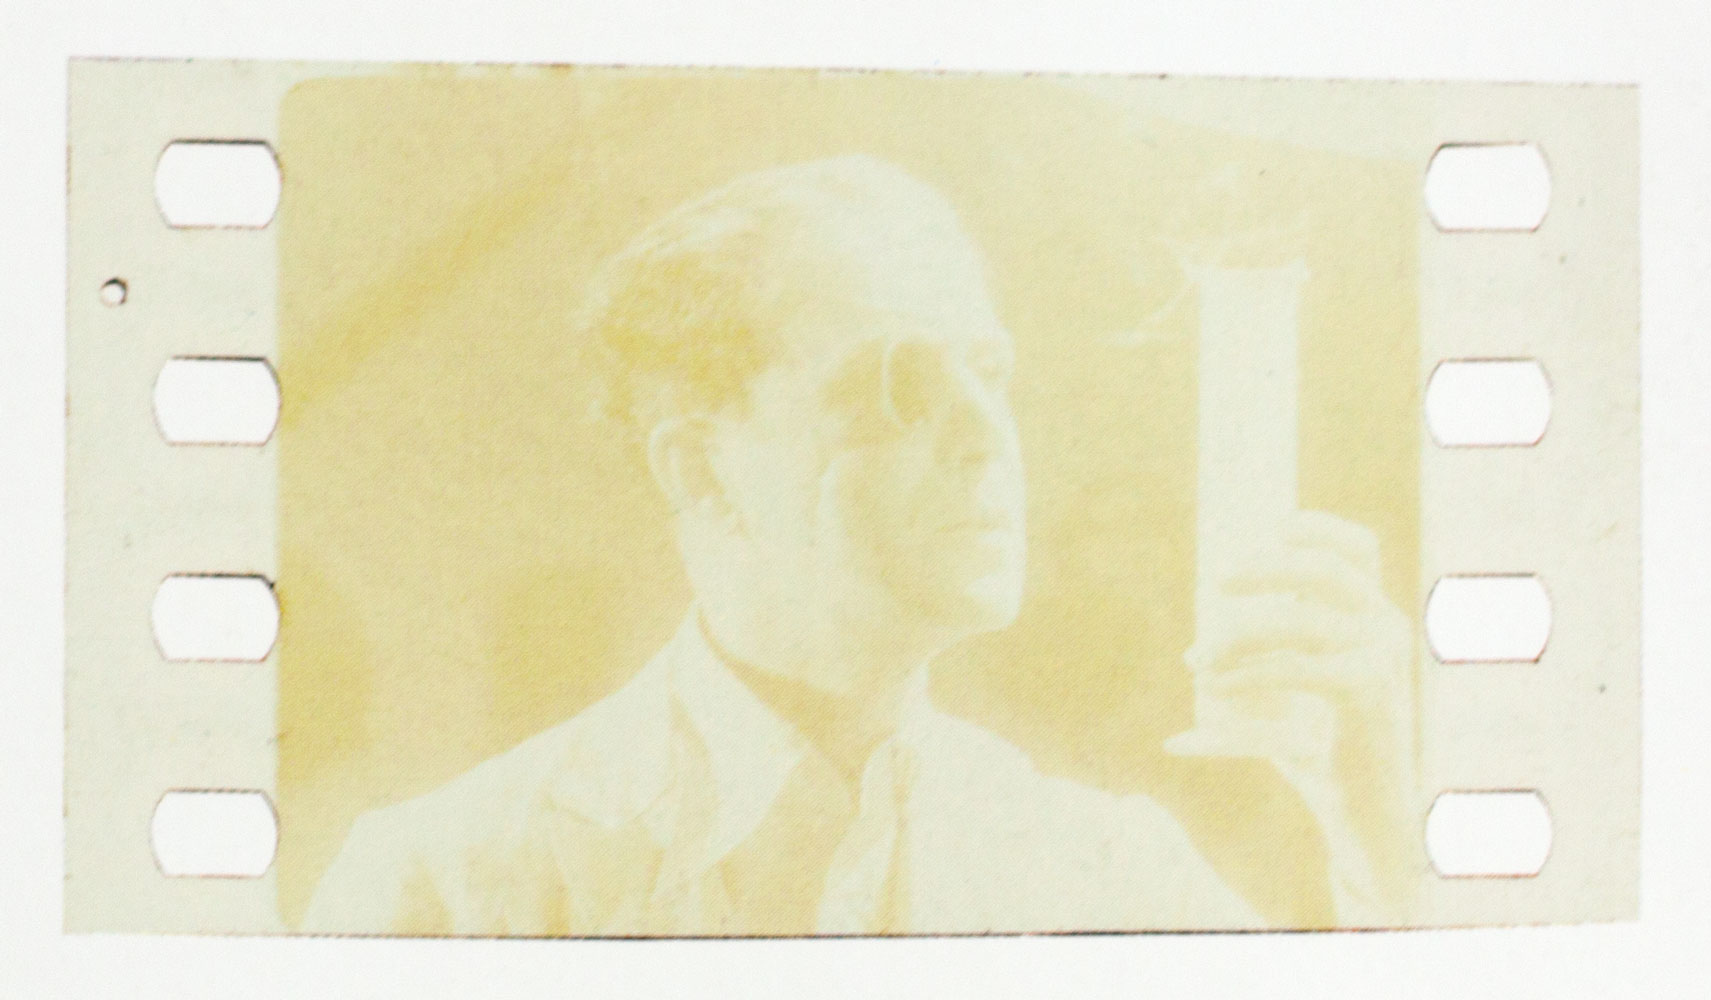 Scan from The Dawn of Technicolor: 1915–1932, James Layton , David Pierce, George Eastman House, 2015. It's labeled as a matrix film, but I'm thinking it's probably a receiver.
Sampled, I get Red H: 53 S: 28 B: 100 Tanning needs some saturation, but not a lot. It's an underlayer of yellow, kind of like a colour grading push. Tanning also needs 100% brightness so it acts like a tanned, but blank, receiver film and doesn't reduce the final image's brightness.
This printing model takes the density of the the filtered colour separations (the red and green negatives) and maps the dye layer onto our it, becoming a digital version of the dye infusion process. And with these starting values, we should now have an engine to duplicate different versions of the Technicolor III I.B. printing process.
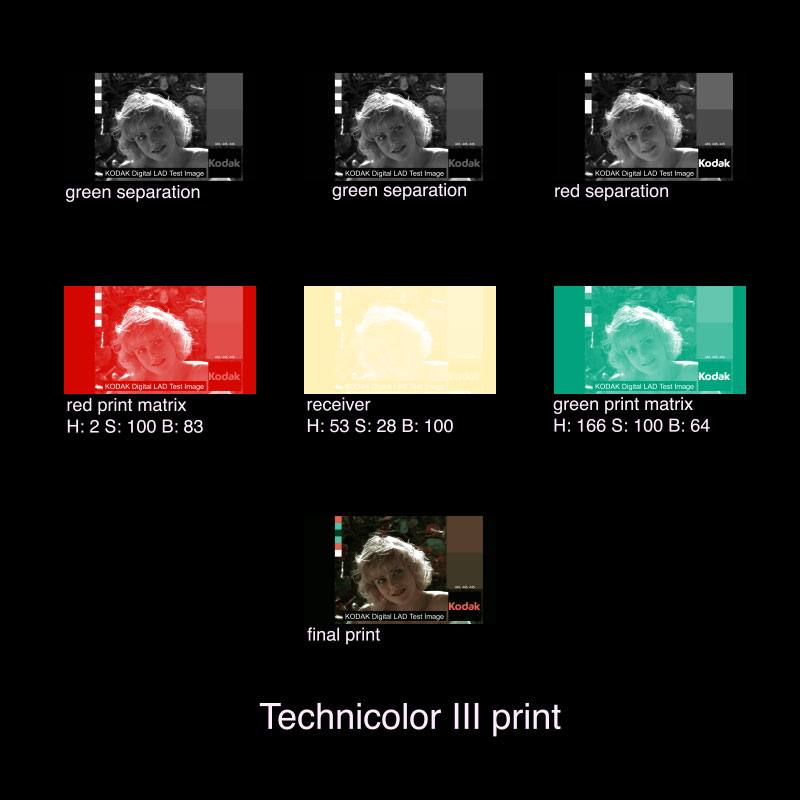
The digital model makes a not half-bad result:
The test
Scan from The Dawn of Technicolor: 1915–1932, James Layton , David Pierce, George Eastman House, 2015. 2
In theory, if this is a viable model, we should be able to run the RG image through it and get a pretty close result out of the other end. The idea being that the RG image has all the Technicolor III legal colours in it, so nothing should be filtered or changed out of it.
With the initial print colours it gives this:
The result is too yellow, not saturated enough in Red and Green, and the colours look slightly off. Time to play.
Let's start with the receiver, and cut down the saturation to something more reasonable, like 10% saturation. That gets the whites looking a little whiter. From there it's just a matter of pushing and pulling the dyes to match. I like to do this with the RGB values, rather than the HSB values to see what's need and what's not. I usually find one colour that seems pure out of red or green, start adjusting for that only in the that colours channel (i.e., if choosing green, then adjust the green channel in the green dye to match the source), then move on to the opposite dye in the it's channel, and then tweak from there.
 With adjustments to red and green dyes, plus receiver. I maxxed out saturation and brightness on the dyes, adjusted the hues, and kept the receiver at 10% saturation.
Here's the same set of colour values, with an image from the restored print of Doctor X. Original is on top.

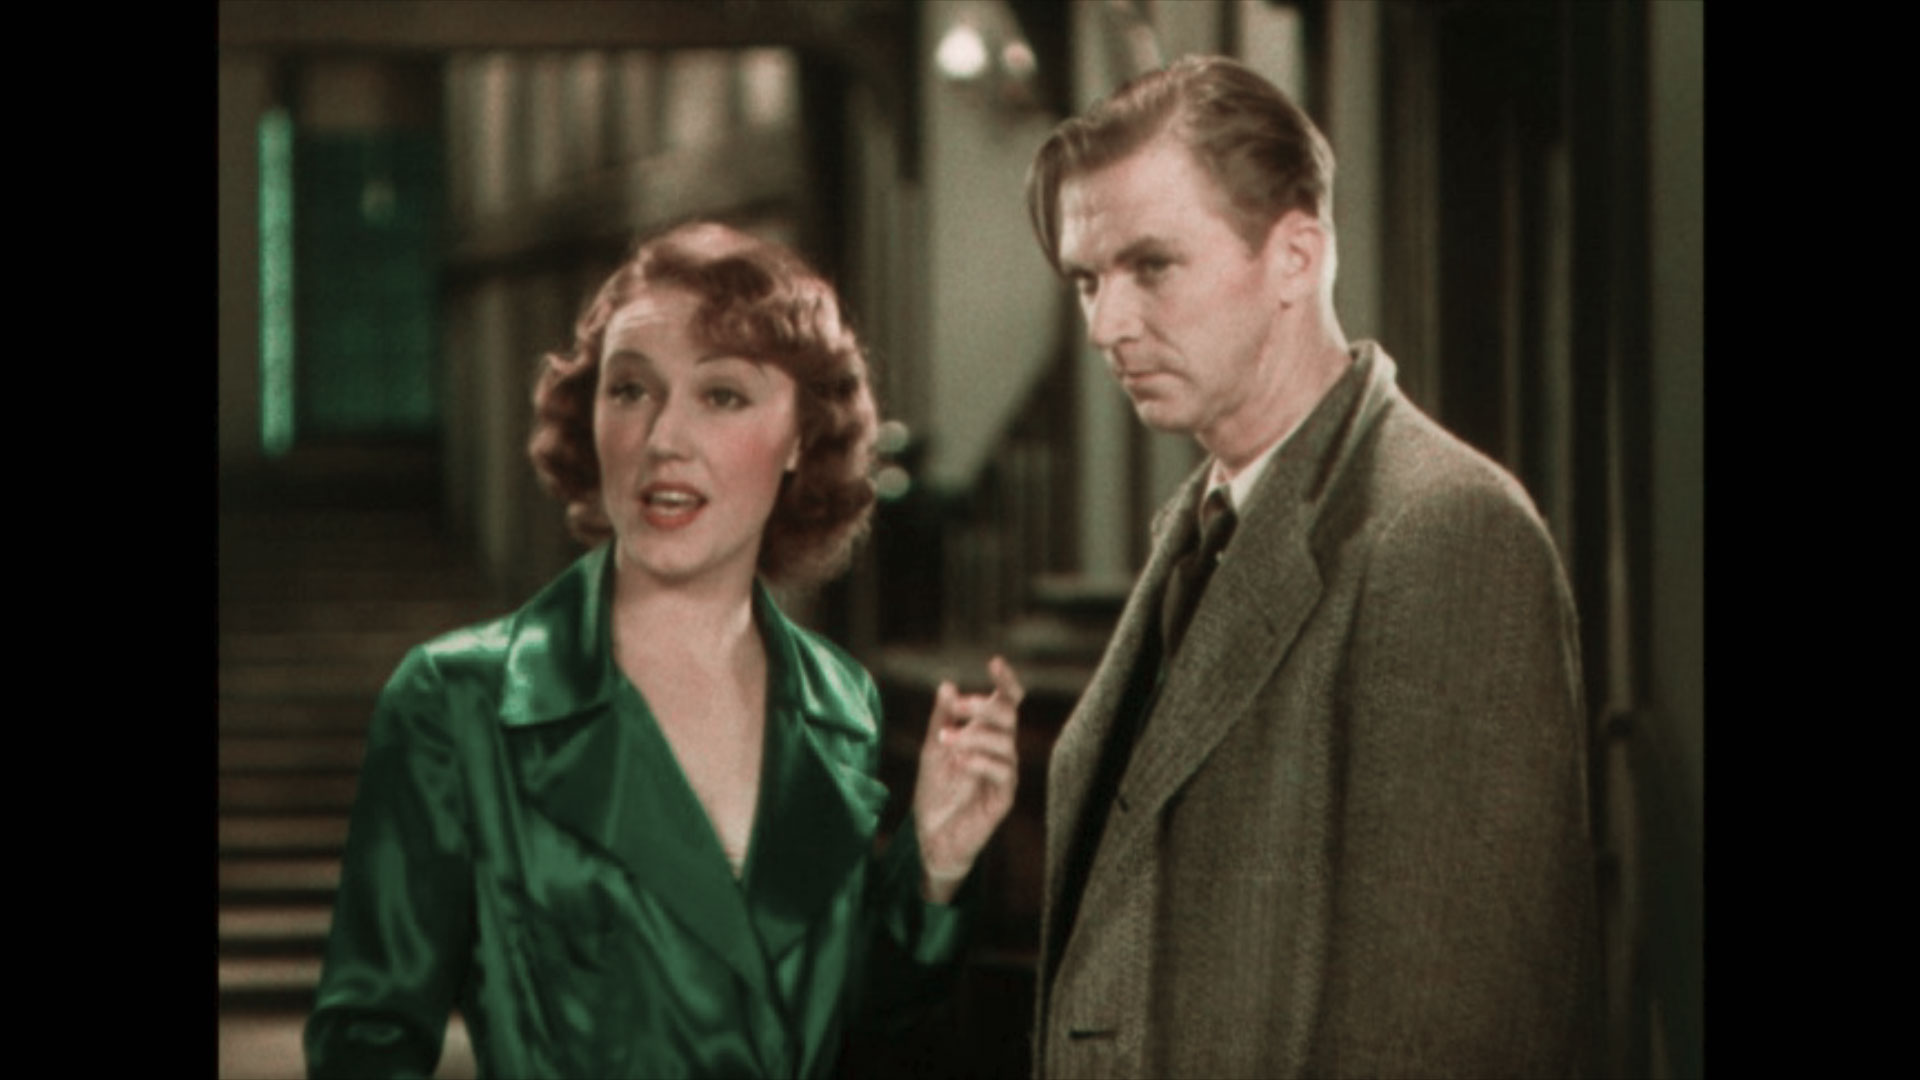
It's pretty darn close. Just the walls are a little greenish, but it sure does capture the emerald green of Fay Wray's nightgown. Interesting that the emerald city green of that nightgown doesn't work without the receiver's yellow in the mix. That yellow is also what gives Doctor X it's look. Take this scene for example:
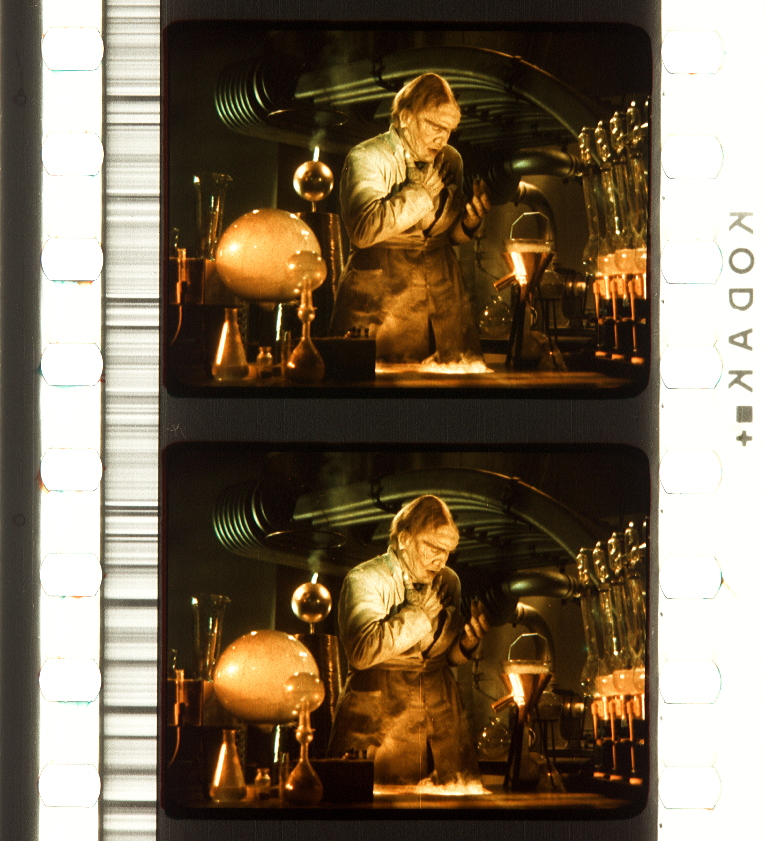 Doctor X (USA 1932, Michael Curtiz). Credit: UCLA Film & Television Archive. Photographs of the Technicolor No. III dye-tranfer nitrate print by Barbara Flueckiger. From filmcolors.org.
Run through the model with the RG settings give this result:
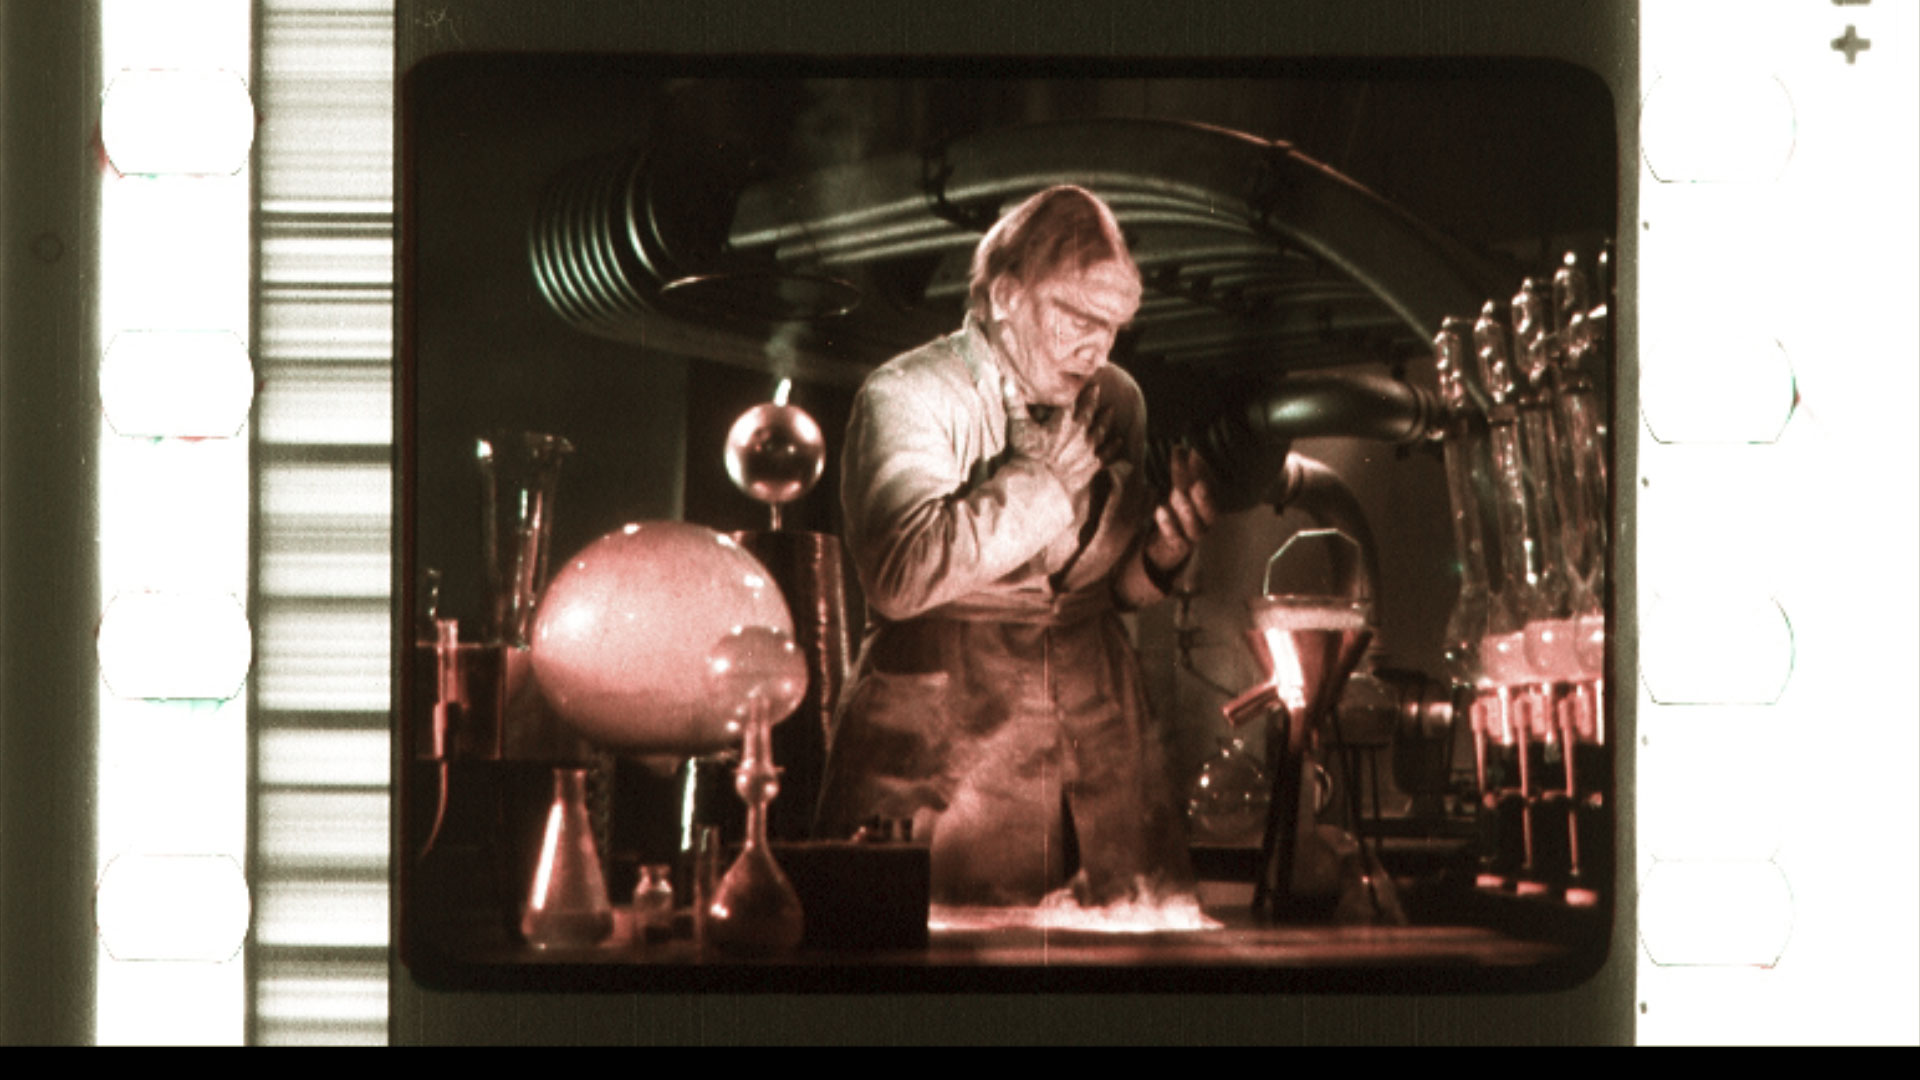
It looks pretty disappointing for the digital model. But if we push the saturation of the receiver to 100%, we get:
An almost perfect match for his synthetic flesh. Technicolor III technicians, I'm on to you! You oversaturated the tanning for this scene.
Emulations
There is a lot more fun to be had, trying to emulate older Technicolor III I.B. prints, the ones with more tanning.
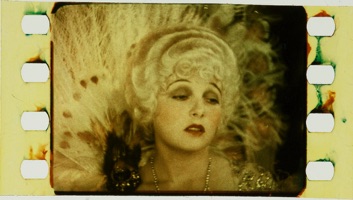 Credit: Images courtesy of the Margaret Herrick Library. Film: Corrine Griffith in The Garden of Eden. Photograph: Barbara Flueckiger. From the Timeline of Historical Film Colors.
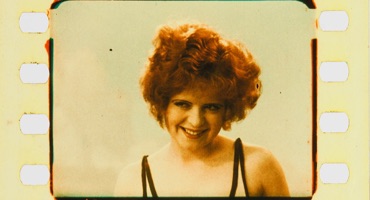 Red Hair (USA 1928, Clarence G. Badger). Credit: Library of Congress. HDR photograph of the nitrate print by Barbara Flueckiger. From the Timeline of Historical Film Colors.
But let's do this scene from Doctor X, only because it's so not the colours from The Aviator's beach scene.
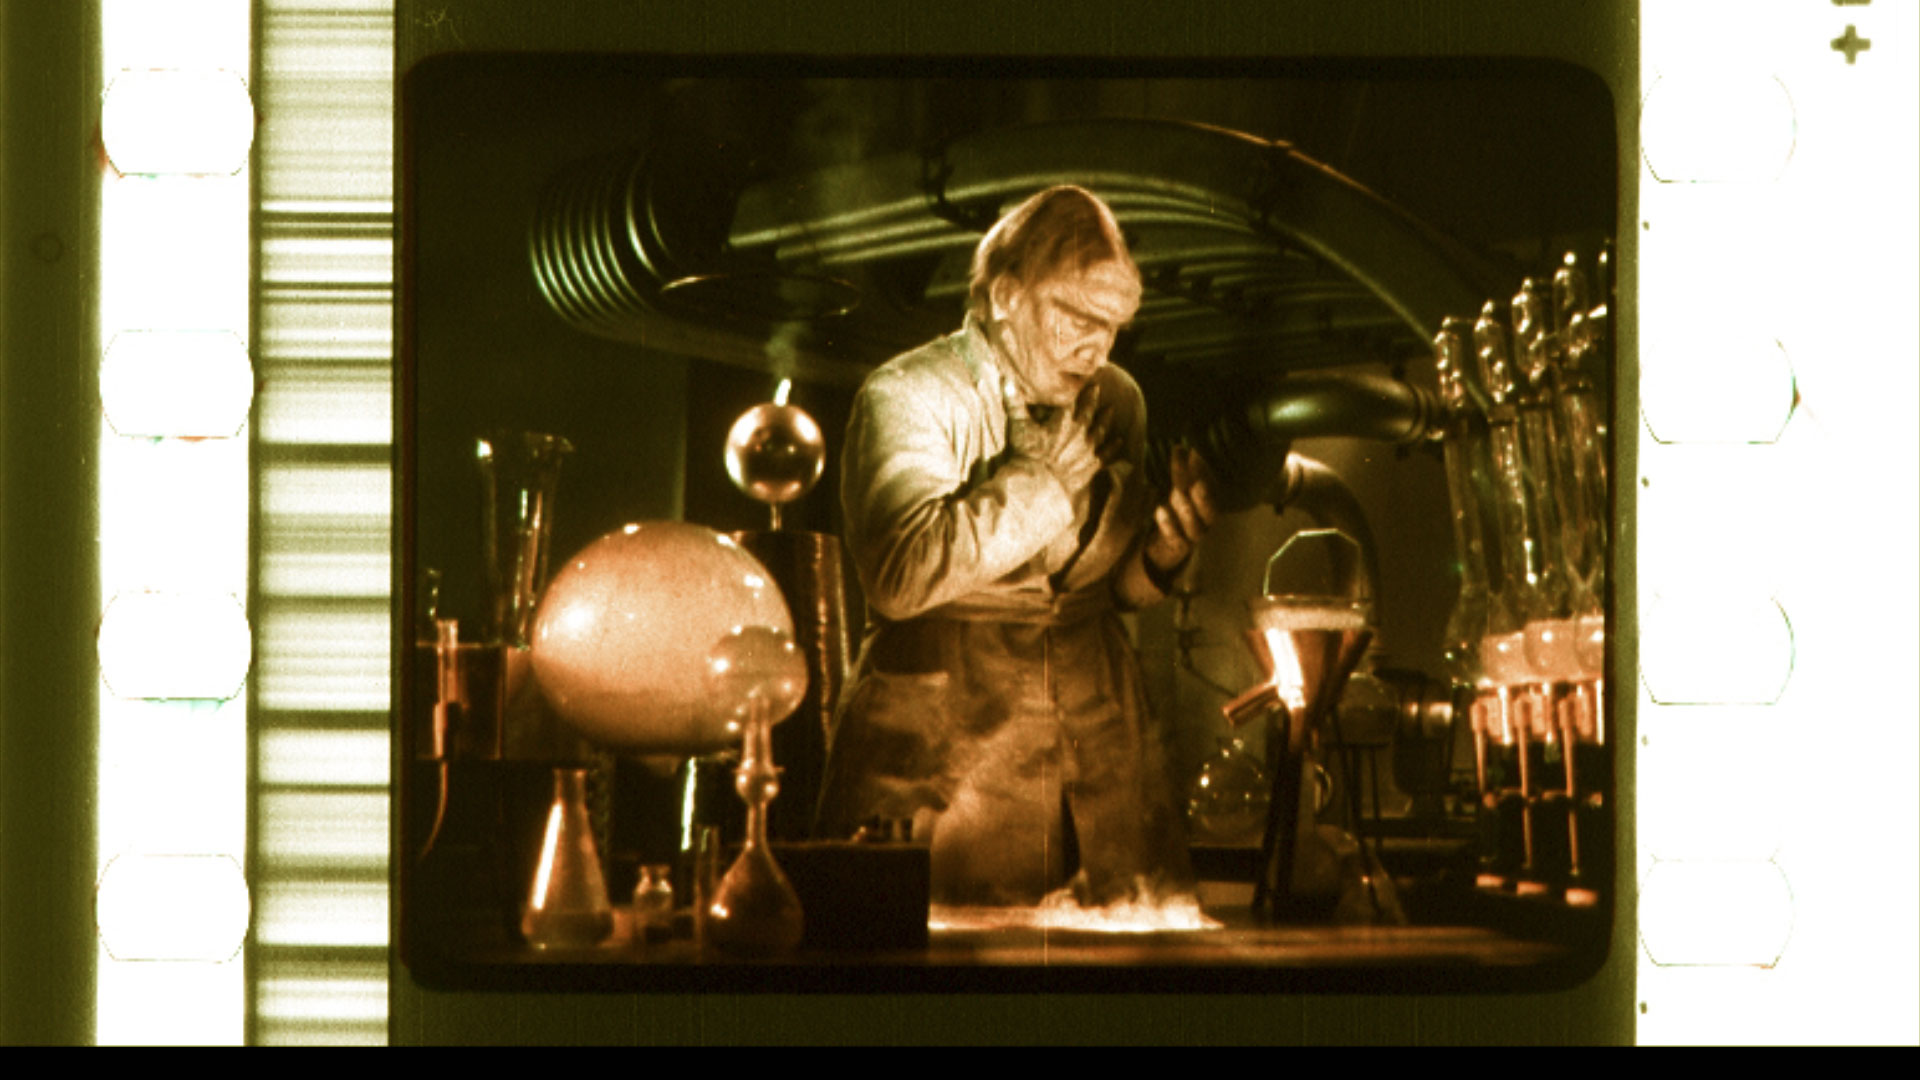
 Doctor X (USA 1932, Michael Curtiz). Credit: UCLA Film & Television Archive. Photographs of the Technicolor No. III dye-tranfer nitrate print by Barbara Flueckiger. From filmcolors.org.
Receiver tanning saturation at 100%. Too easy man.
Conclusions
The point of all this exercise was to find how Technicolor did what can pass as full colour, with just a two colour system. All this sampling and experimenting dances around what is really happening, so to understand it, go back to the basics of colour theory.
 Source: Ball, J. Arthur (1935): The Technicolor Process of Three Color Cinematography. In: Academy Technicians Branch Technical Bulletin, May 31, 1953, 1935 Volume, p. 5.
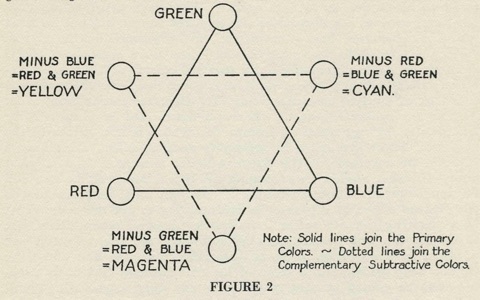
To produce full colour for (most) humans, we can do it with three primary components: red, green and blue. Added together, these can create all the colours, including yellow, cyan and magenta.
Adding colours in digital is the equivalent of working with light, and it's like shining different coloured lights together, or putting a spectrum of light together. This is exactly what is happening on the screen you're reading this on, it's made of of red, green and blue lights.
The same goes for the subtractive colours, cyan, magenta and yellow. Subtracted (or multiplied in digital) can create all the colours. This is the equivalent of mixing paint, or dye.
You don't have to only mix cyan, magenta and yellow. See how green and red are in there? Green contains cyan in it (with yellow) and red contains magenta in it (with yellow). The only problem is, filtering for and mixing together pure red and pure green completely filters out blue, leaving it black.
This is the choice that Technicolor did. They chose two colours that produced the part of the spectrum that created acceptable white skin tones. Red and green produce a salmon coloured white skin. Add a splash of yellow, and you can turn salmon to pink. Yep. Hollywood.3
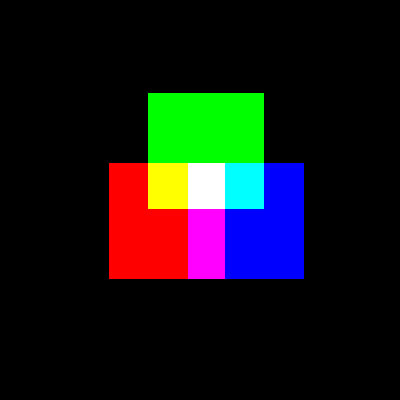
For example, if we take Marcie,4
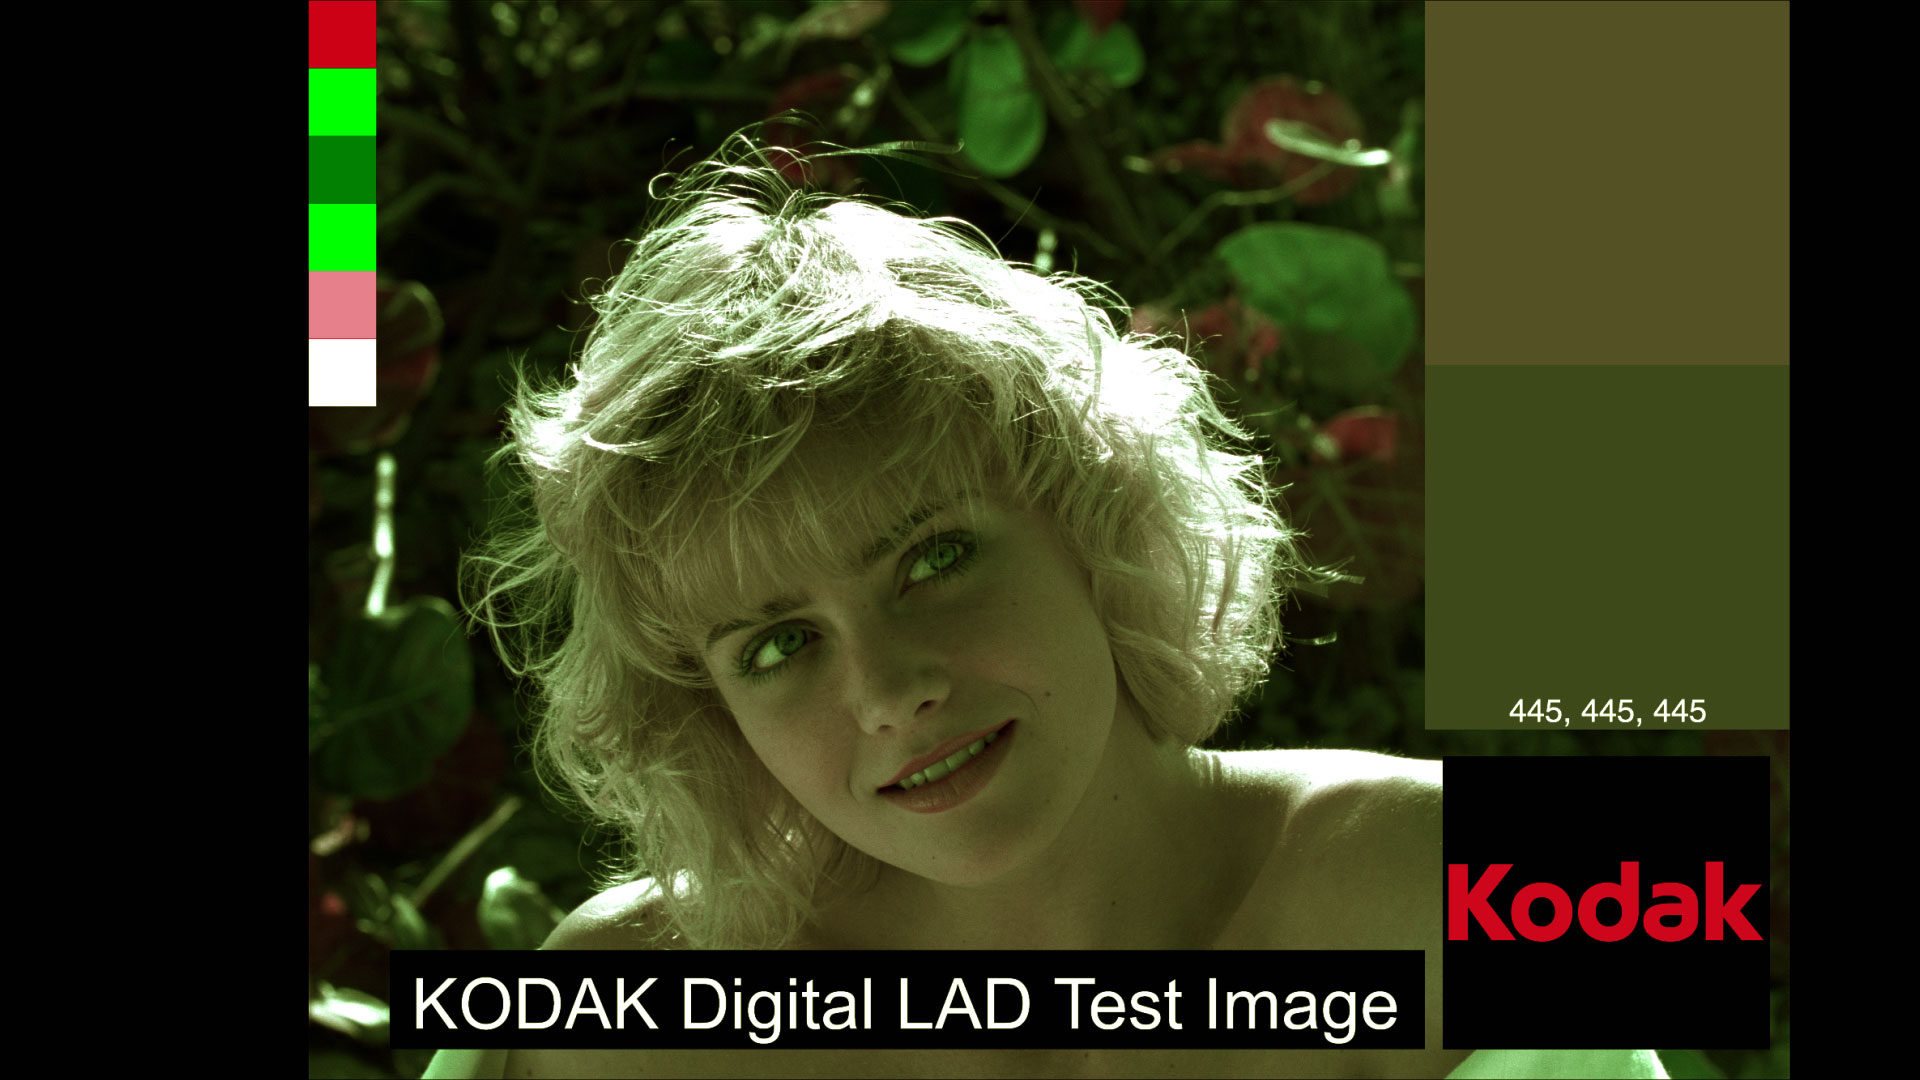
and with the camera portion of the model, filter for pure red and pure green,

We filter out all of the blue (the blue swatch turns to black). The solution is to let some blue pass through the green filter, somewhere around 50% of it or so.
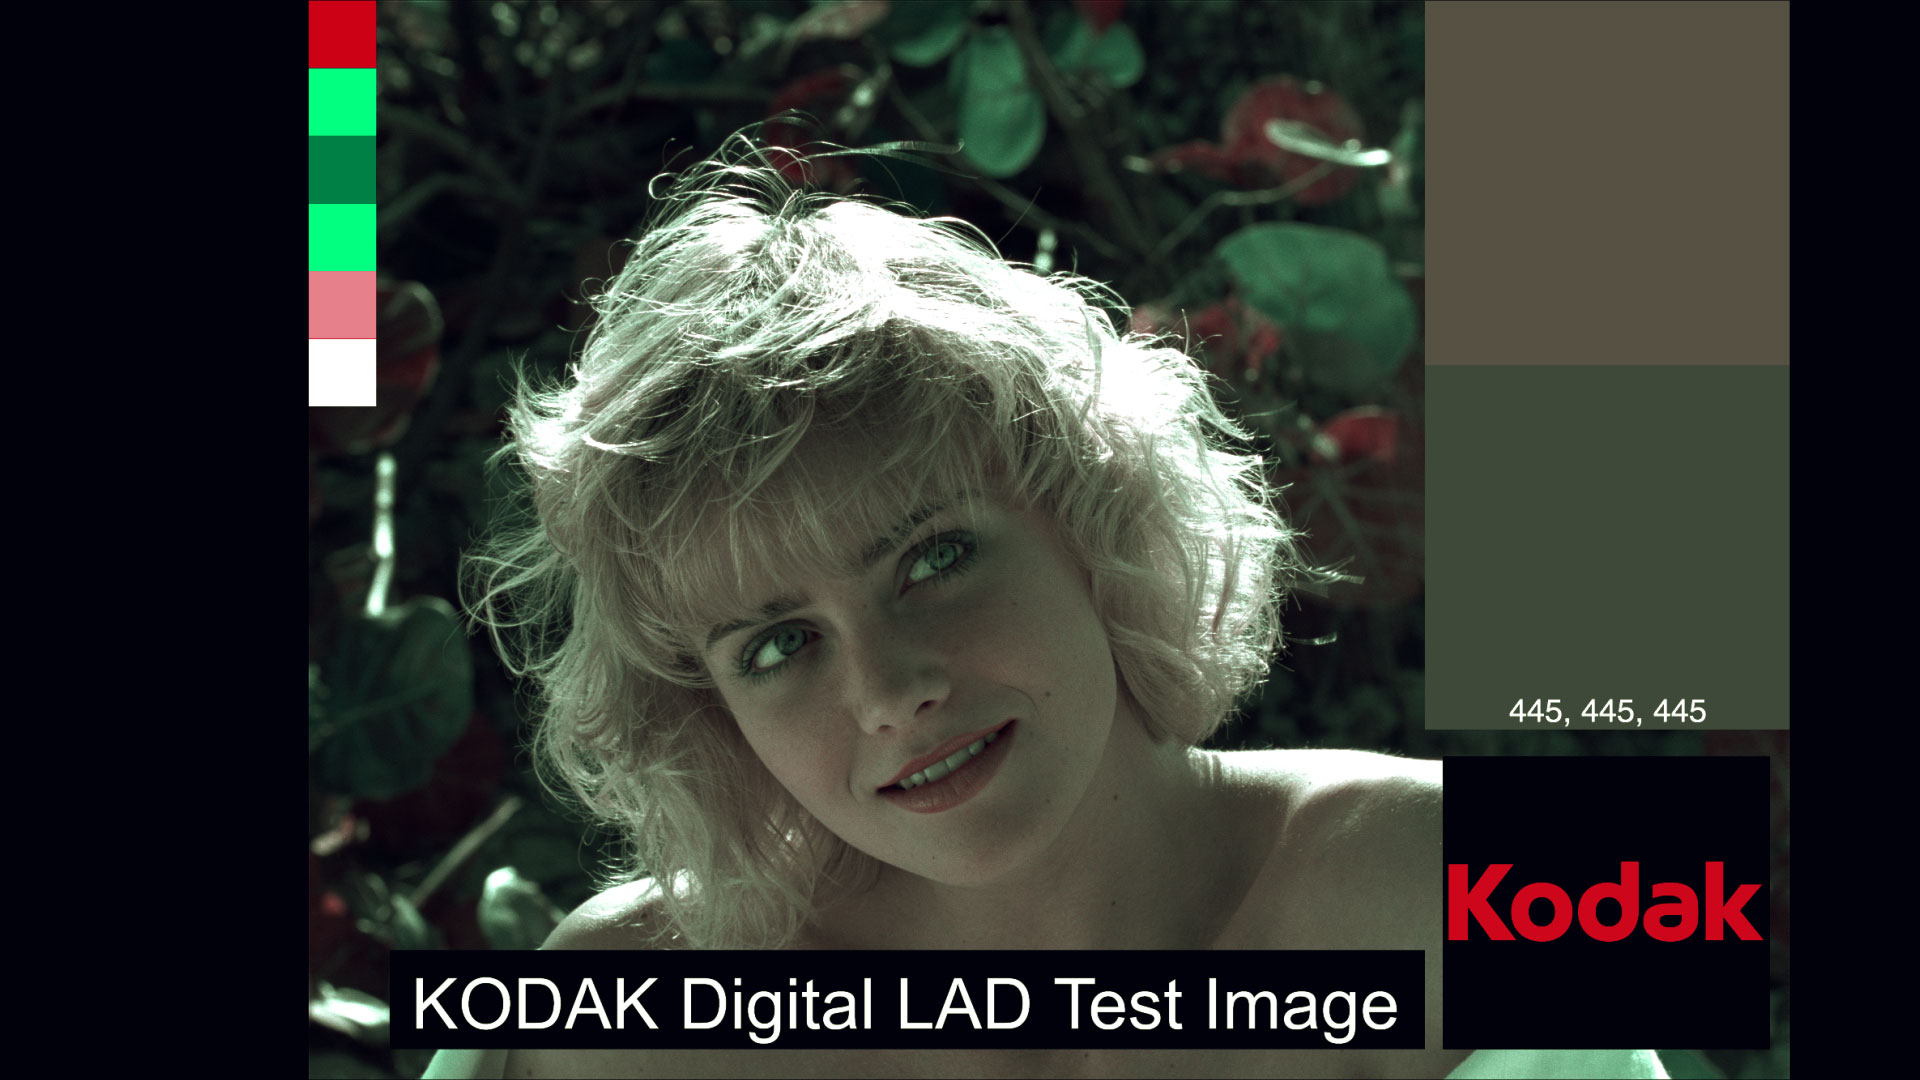
With this corrupted green filter, the effect is allowing a stand in colour for blue (that gets dyed green down the line) but it also means that there will never be a 100% green. Green will fade in density. We see this in the RG image, the G is less dense than the R.
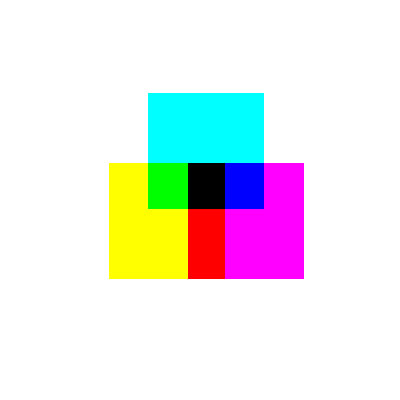
For putting the image back together, if we use a pure red dye and a pure green dye, we get this nightmare:
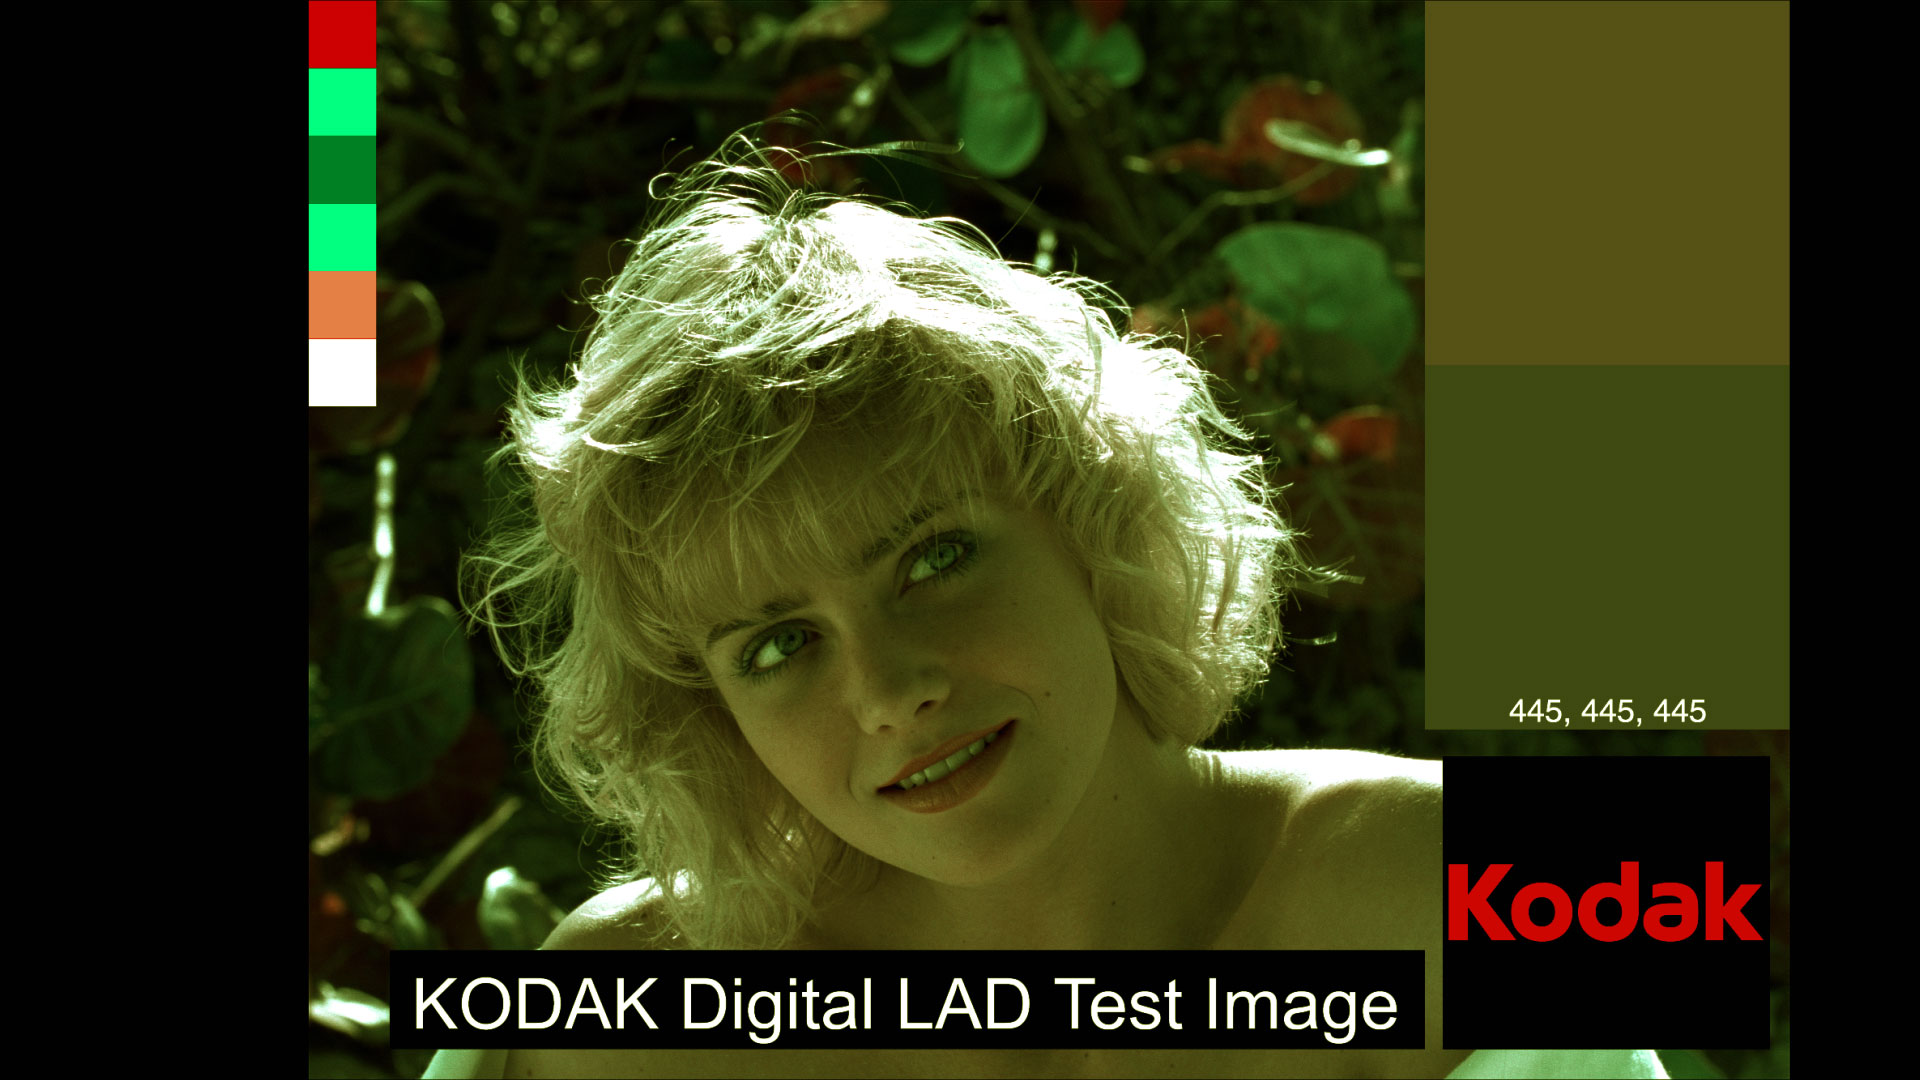
Good things about it are that it is certainly bright, and the red and the green swatches are 100% correct, but the skin tones are way off. If we do the same thing as the camera filter, and corrupt the green with about 50% blue, we get:
Greys start to look more grey, skin tones less green. The sacrifice is that the green swatch goes more cyan, so this will never produce a full green. What is it lacking? A lot, yeah, but for pleasing skin tones, we need yellow. So, as a hack, the opportunity technicolor had was to add it to the receiver by tanning. So if we add pure yellow,
We're back to this mess. The trick is to balance the yellow density with the green density, and find someting that works. That's what Technicolor did over the run of the 2-colour process.
That is the basics of how it works.
Notes
-
Check out the collection of images of Technicolor III films at Timeline of Historical Film Colors, Technicolor No. III.↩
-
I used samples of the nitrate from the book, The Dawn of Technicolor: 1915–1932, James Layton , David Pierce, George Eastman House, 2015. Also check out Two-Color Process | George Eastman Museum.↩
-
Technicolor III's competitor, Cinecolor, used red and cyan filtering, and printed with magenta and green dyes. It was used more for animation and for short films, mostly travelogs shot in places like India and Nepal. It could also produce blue-ish skies. ↩
-
While I'm on a tear, let's just note that Marcie, or Marcy Rylan to give full credit, is a white-skinned, female-gendered, non-active participant in this image who does not even get to engage the viewer with her eyes. Even in test shots, the dominant discourse of the time is present! Ug. Here's to you Marcy Rylan. I appreciate you for who you are, and not just your image. ↩
Published Thursday, March 3, 2022.