Sharpening in passes

Drawing from Bruce Fraser's idea that sharpening in passes is a better method than one-pass sharpening, I built a set of FCPX filters to do just that.1.
The core of the idea is to separate sharpening into:
- source optimising sharpening,
- creative sharpening, and
- output sharpening.
In the digital video/film/media world, that can apply to applying passes of sharpening for correction to camera footage (in camera or after injest2), creative "look" sharpening, and applying a sharpening pass or optimise for each output delivery size, e.g., 720p web, 1080/2k monitor delivery, or 4k projection.
This may run counter to others' advice, and it may not work for you. I'm still experimenting with the method myself, but what's been lacking is having a proper set of tools to even try this kind of work. The standard method has been: apply the sharpen filter.
Bruce would have said, "that's not good enough." And I'm starting to agree. The sharpen effect is a rather blunt tool. Unsharp Mask is better. An edge sharpener would be even better. And a method to use these tools in passes would be kind of cool.
So here's the filters to let you do just that.
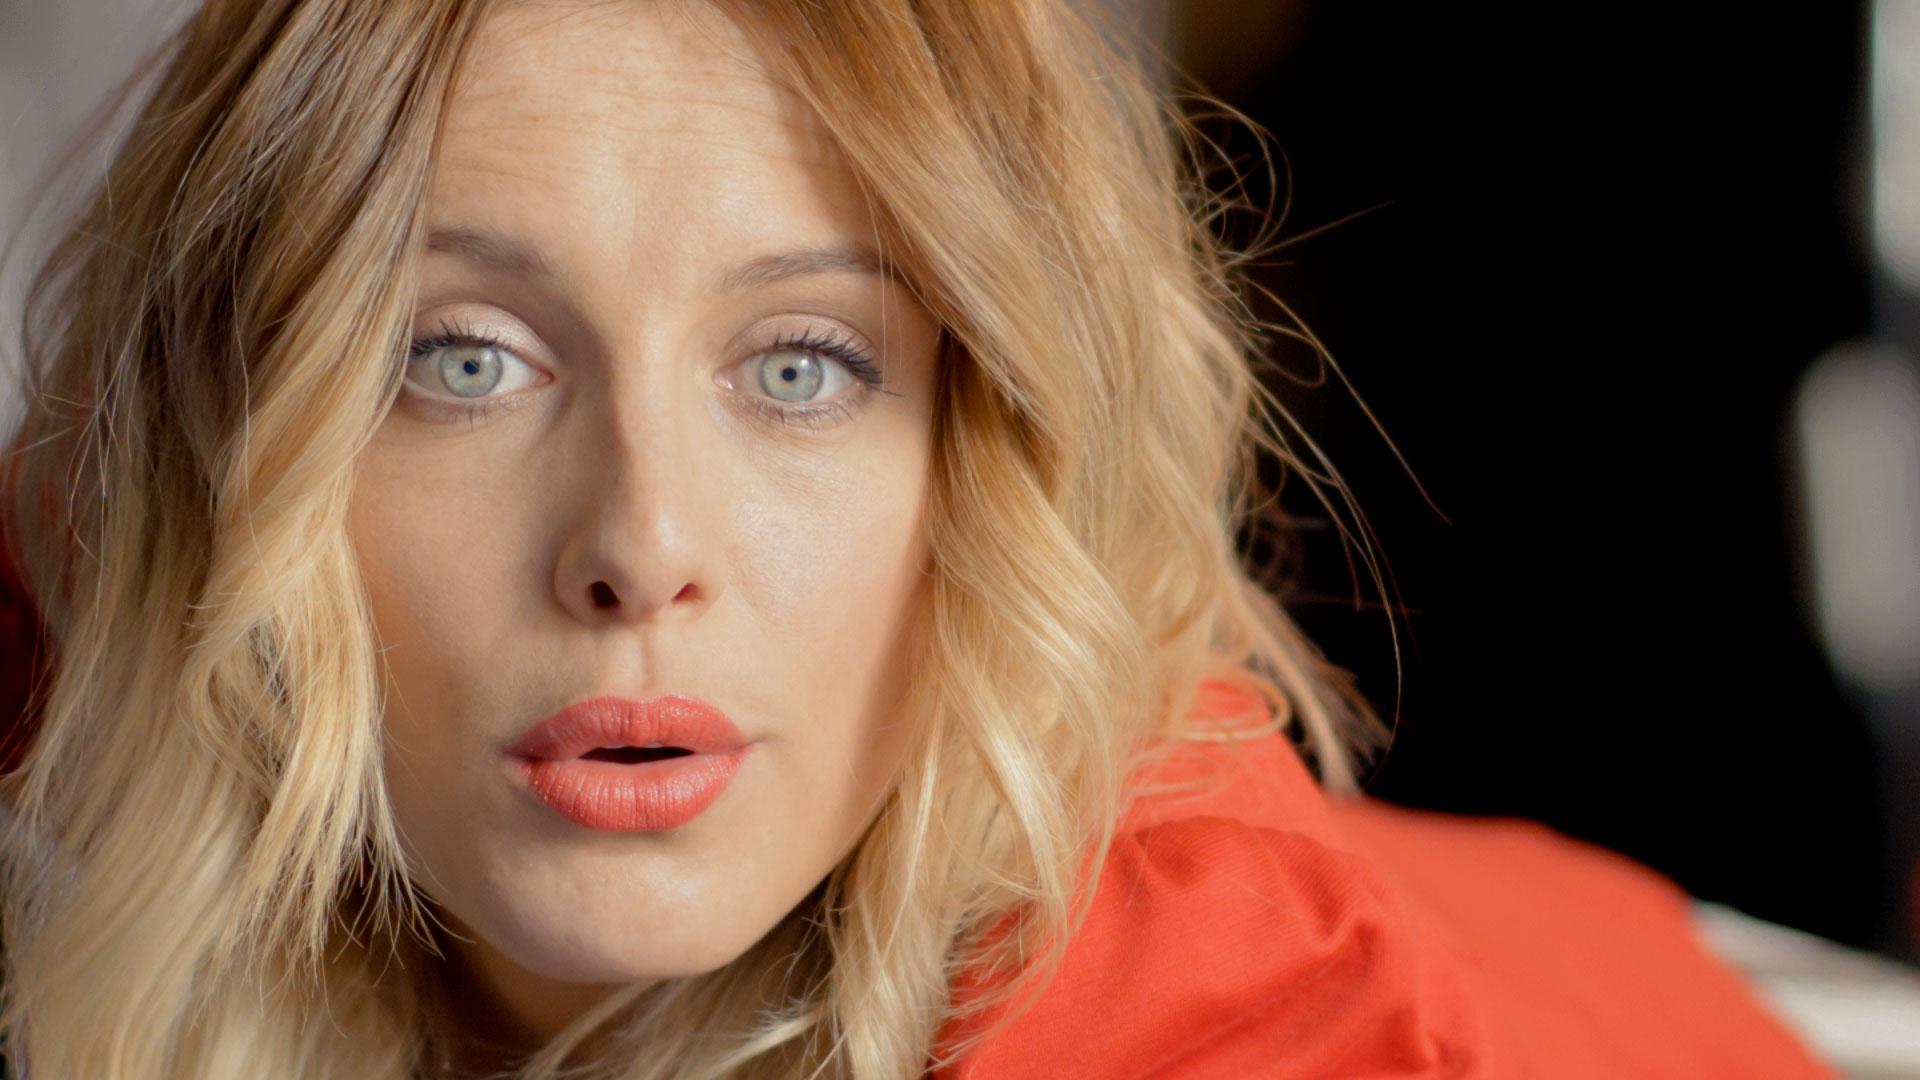
Let's try them out on this unsharpened example of Casey. (Click for full-size image.)
fsorvin Unsharp Mask
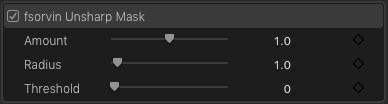
First off, Unsharp mask is the classic way of gaining some control over regular sharpening (also known as sharpen everything).
If you know how to use an Unsharp Mask from Photoshop (or if you ever did an unsharpen in a darkroom), you're all set. Unlike sharpen with one slider, unsharp mask has three sliders.
Use Amount to set, well, the amount of sharpening you want to do. It's just like using the sharpen slider in Sharpen.
Radius sets the size of the sharpening halo. Sharpening doesn't actually make anything sharper, but rather increases the contrast around pixels of different contrast. Radius sets the size of the pixel area to be effected. This is why Unsharp Mask is so useful, because it can set the flavour of the sharpening based on what's in an image. Use it to control your sharpen halos.
Threshold tunes the level of what will be sharpened, based on contrast. At zero, everything will be sharpened. As you increase threshold, high-contrast image areas will be sharpened while low-contrast areas will be less sharpened. It's like curving off the low end of sharpening or masking off an area with a feathered mask.
fsorvin Unsharp Mask in action, over done for effect. (Click for full-size image.)
fsorvin Edge Sharpen
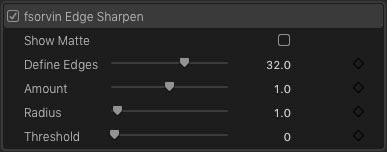
Edge Sharpen is the Unsharp Mark with an edge detector. The edge detector finds and defines the edges in your image, masks everything else off, and applies the Unsharp Mark to the detected areas.
Hit Show Matte to see the edges and use Define Edges for adjustment. Then turn off show matte and sharpen your edges.
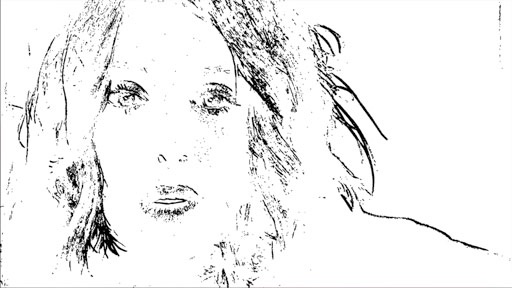
Edge detection.
Edge Sharpen is really good at adding local emphasis to images.

fsorvin Edge Sharpening, over done. (Click for full-size image.)
fsorvin Output Sharpen Layer

Because it's for final sharpening, Output Sharpen Layer comes in as a title effect. You'll find it in your Titles browser in FCPX, and it works like a After Effects adjustment layer, adjusting everything below it in your project timeline. Lay it down over your whole timeline to use it as an output sharpener and adjust it for your delivery size.

It uses the good old sharpen tool for sharpening, because at this point in your process, you're sharpening to optimise your images for output resolution, not for effect (in other words sharpening everything).
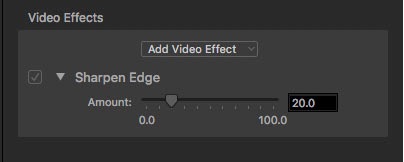
ALSO, if you're making your own final deliverable, you might want to consider using the sharpen tools in your delivery tool (e.g., Compressor, Handbrake, and so on), as appropriate for the resolution you are making the deliverables. Compressor has a pretty fine Sharpen Edge video effect. Handbrake has a set of sharpen tools under filters with different settings. Make sure your preview your sharpening at 100% and don't over sharpen.
Output Sharpen is a really great way to preview your final sharpen in FCPX, at full res so you can judge your sharpening prior to final output. Then turn it off, make your full-res master, and do your indivisualised sharpening for different delivery sizes with your compression tool.
How to use
Here's how I recommend you use the tools. All of these steps is your final step, after your edit is locked, colour grade done and you're ready to make your final master.
- Set up your environment. Work off a monitor, and set it to the resolution of a delivery source if you can. If you're delivering a 1080p, set up a 1080p monitor. If you can't do that, at least look at your images at 100% in the viewer. Ideally you want the monitor size to be the same as the environment where you will screen (e..g, a theatre, or on a TV monitor) and you want to view it the same distance back where your audience sits, but do the best you can.
- Set up your output sharpening. Yes, I know it's a bit unintuitive, but you're setting up your environment. Add a sharpening pass layer over your whole timeline. Find a frame that's reasonably sharp that you like and do your output sharpening pass to look the way you want your final product at that resolution.
- Now, go through your shots and do creative sharpening. With your environment set up, you can now see what you're doing and what needs to be sharpened. Get creative here.
- If you're doing grain, add it after all the sharpening including the output sharpening. You don't want to sharpen grain, trust me. (Unless you really want to. I don't make the rules.)
- If you're delivering at different resolutions, you have choices, sharpen for your highest res delivery with output sharpen, and then do another sharpening pass in your delivery tool i.e., in Compressor. If you've added grain, you're situation is a little more difficult because of rule 4. You might want to output masters for different resolutions, or do a sharpen pass with the grain in your delivery tool. Experiment and see.
- With any sharpening, the advice always is: sharpen, and then back off your sharpening. We all tend to over sharpen. Sharpening should be subtle.

Casey, original on the left and Casey, with a multipass sharpen, using Unsharp Mask, and Output Sharpen Layer on the right. (Click for full-size image.)
Installing
Download fsorvin sharpening
tools,
unzip and put everything in the Put in Effects directory into your
(user home folder) ~/Movies/Motion Templates/Effects directory, and
everything in the Put in Titles directory into your (user home folder)
~/Movies/Motion Templates/Titles directory.
The effects will appear in your FCPX effects, under Video/fsorvin/Finishing and in your titles, under fsorvin/Finishing.
Notes
-
See Real World Image Sharpening with Adobe Photoshop, Camera Raw, and Lightroom, 2nd Edition by Bruce Fraser, Published Aug 21, 2009 by Peachpit Press. It's a good book that will change your life. For a shorter summary, check out Guide to Image Sharpening on Cambridge in Colour. ↩
-
Yes, I said "in camera sharpening" and I know that runs counter to gospel. But have you ever shot with a HVX200? That sucker sometimes needs a bit of sharpening in order to resolve a decent amount of detail off it's image pipeline before it gets encoded. So yeah, sometimes you might need a bit. Making that decision is part of the creative process. Make yourself aware of it, and use it to your advantage, even if that decision is to just turn it all off. ↩
Published 16 Dec, 2019.